The three areas everything hangs off
Groups, Sets, Students. Learn what belongs in each one and the rest of the product explains itself.
What you are looking at
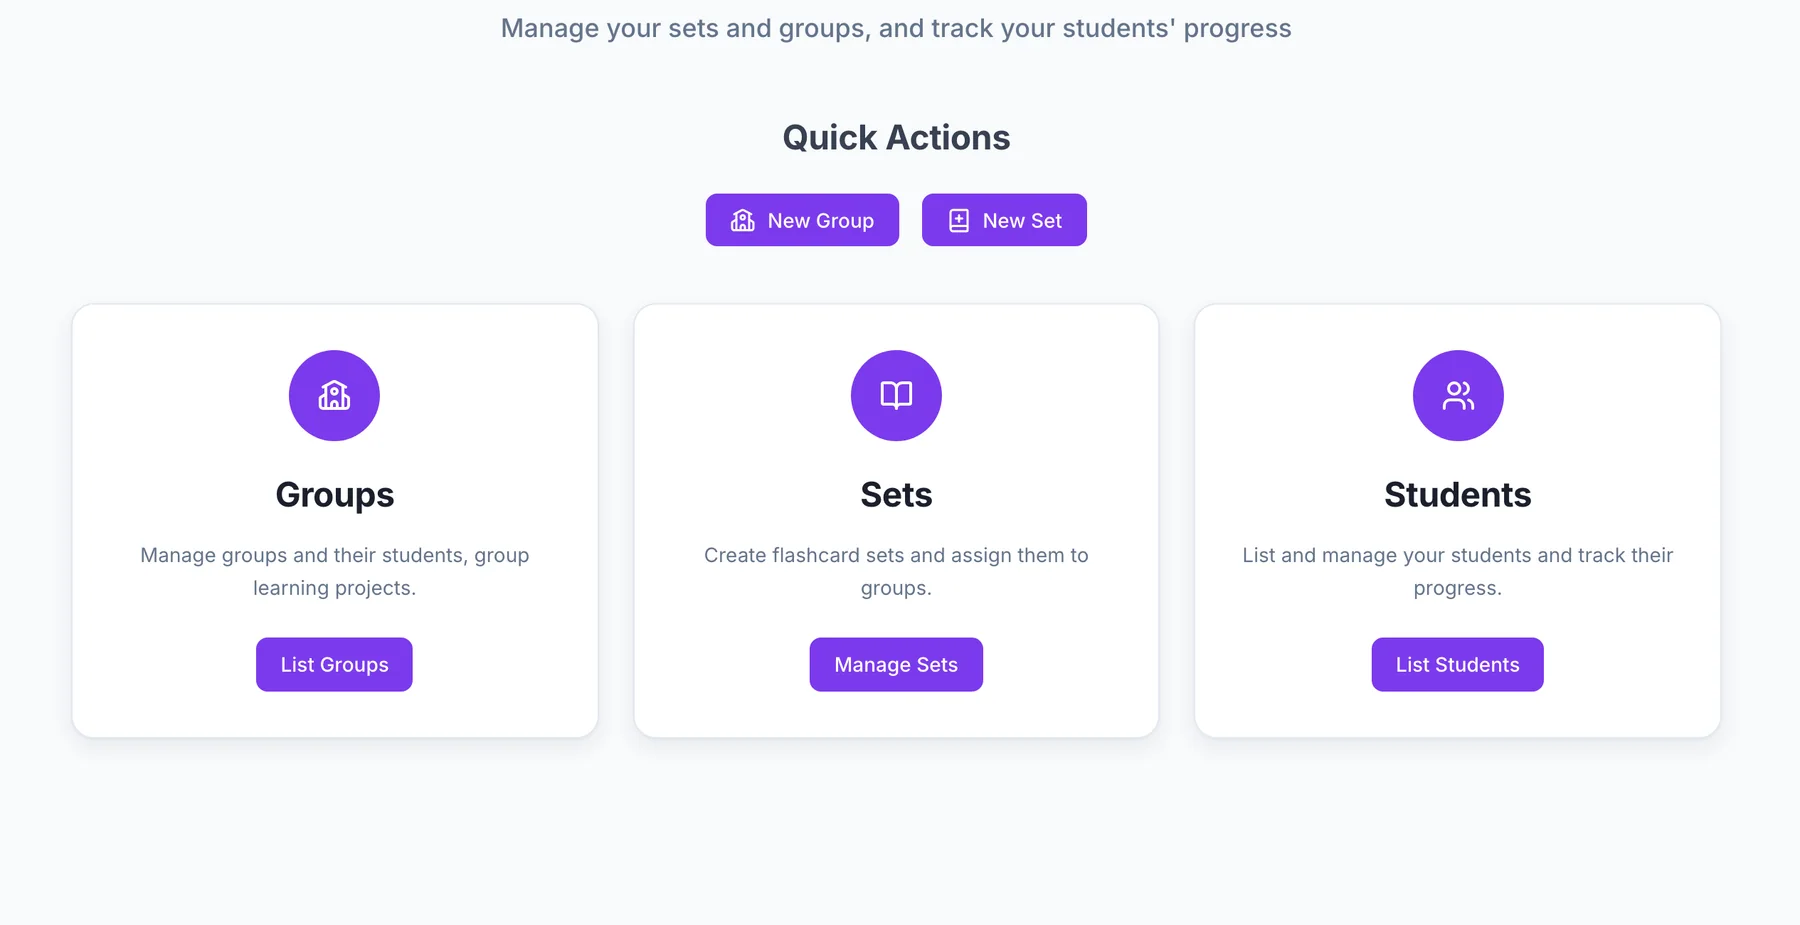
A group is a class you invite people into. A set is a stack of cards you build. Students are the people connected to you — through a group, or one at a time. Those three ideas carry the whole product.
Your material and your people are deliberately kept apart. A set belongs to you and can go to any number of groups and individuals at once; taking it back from one of them changes nothing anywhere else.
How to find your way
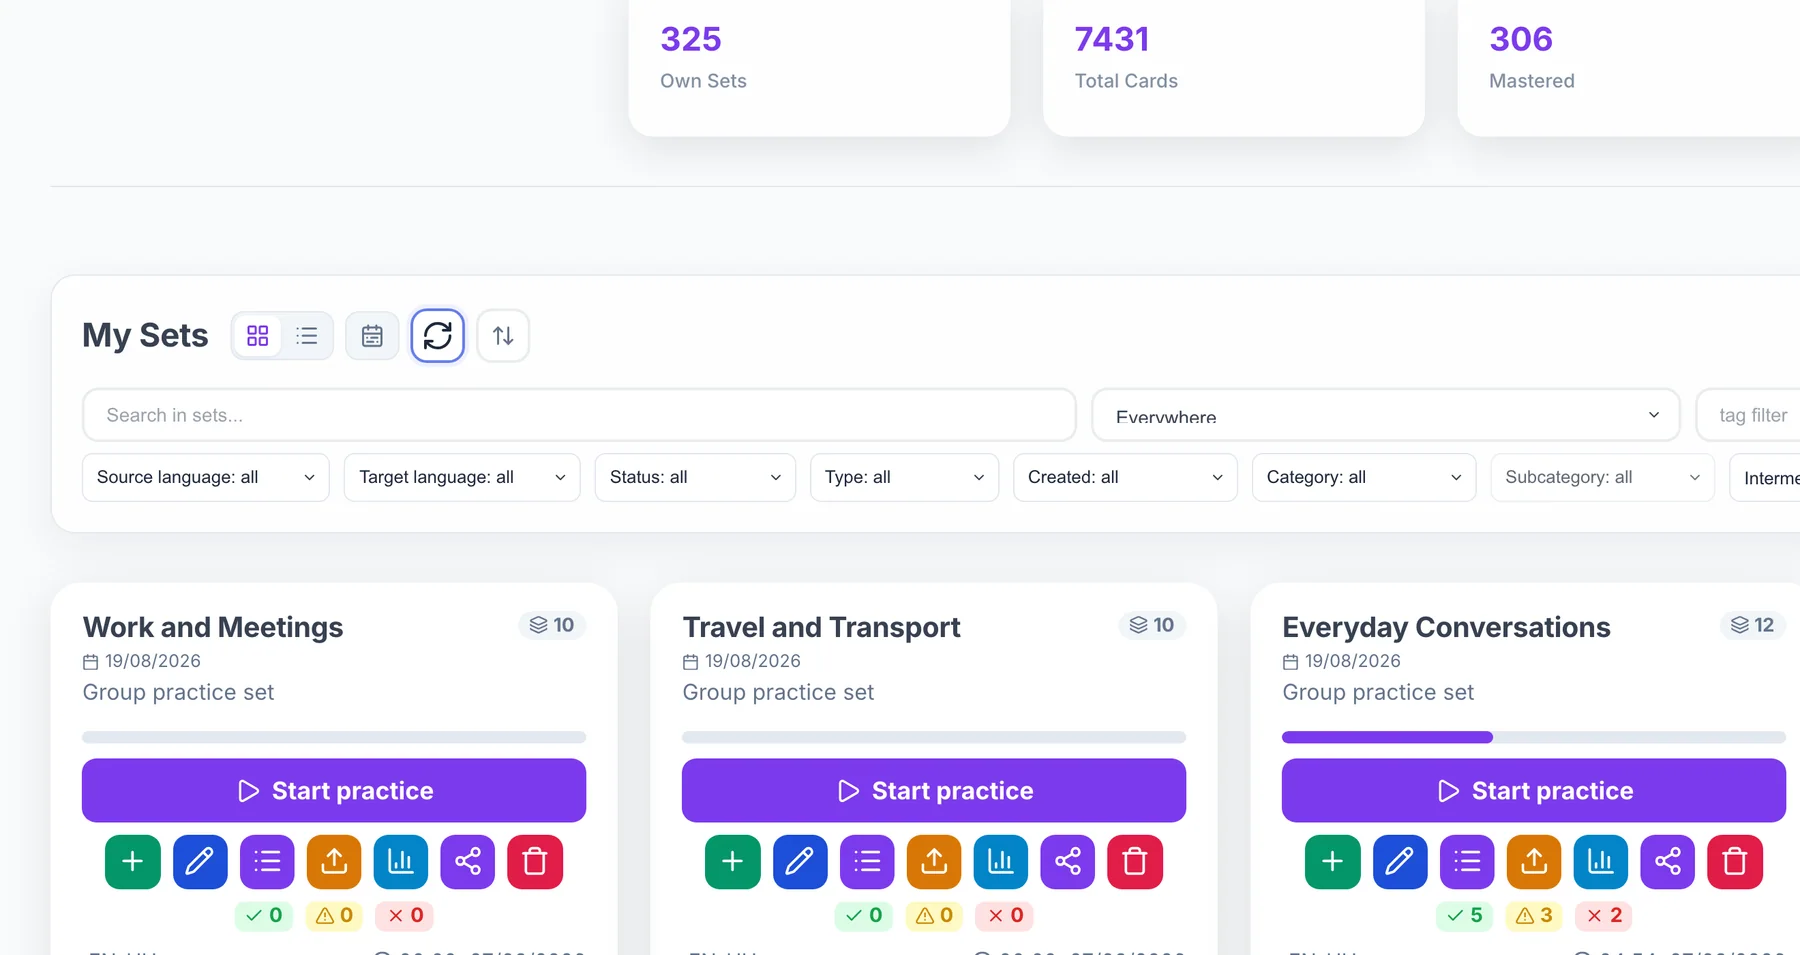
- Open Sets to build material and to find it again. The filters narrow by language pair, card type, and how far your students have got with it.
- Open Groups to create a class and invite people into it.
- Open Students to see everyone connected to you and how they are doing.
- Switch the set list from grid to list when you want to work on several sets at once — the checkboxes and bulk actions live in the list view.
Why it works this way
Teachers who try to file material by class end up with duplicates: the same twenty words, copied into four sets, and four places to fix a typo. Keeping sets separate from groups means there is always exactly one copy of anything — and a card you correct tonight is the card every class studies tomorrow.
Build a set by hand
The slowest-looking route, and still the best one for a lesson you have just taught.
What you are looking at
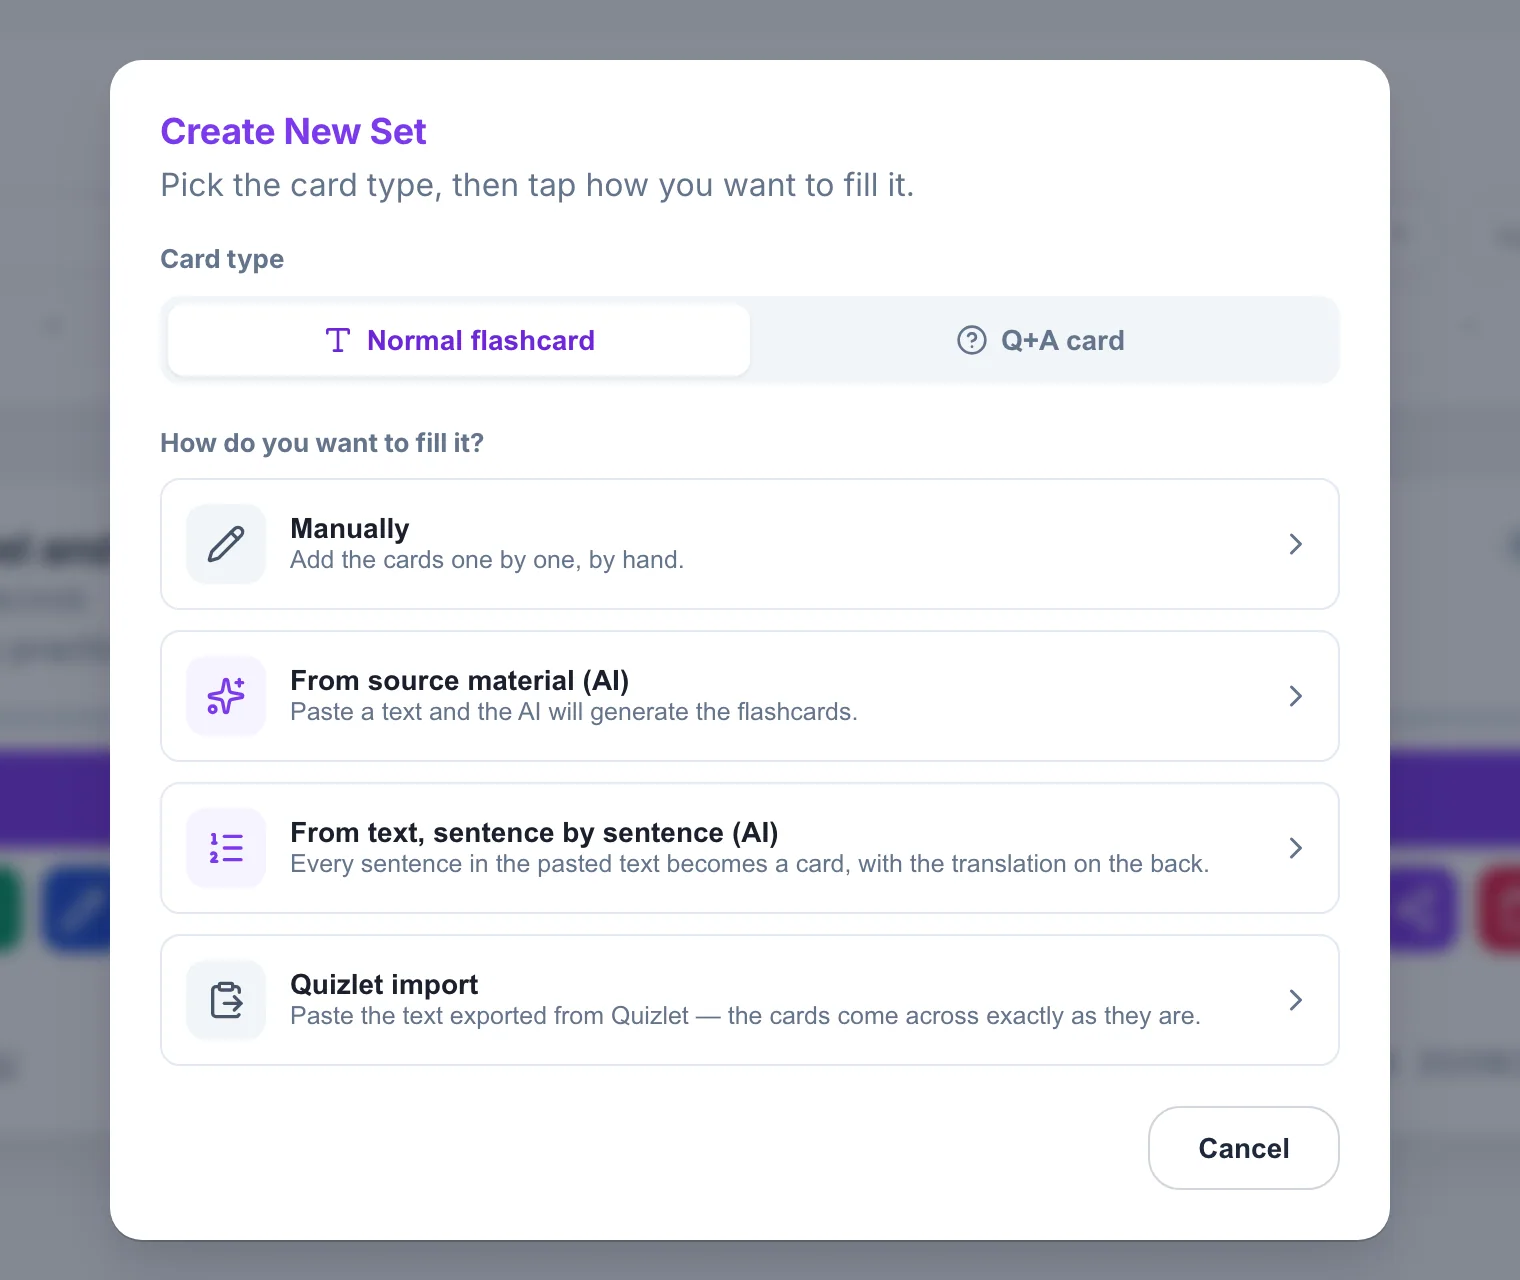
A set is a container: a name, a language pair, and cards. Creating one starts with a chooser, because two decisions change everything that follows.
Vocabulary is a word on one side and its meaning on the other. Q+A puts a prompt on the front and an answer on the back — for grammar points, reading comprehension, anything that is not a single word. The choice is made per set, not per card.
How to do it
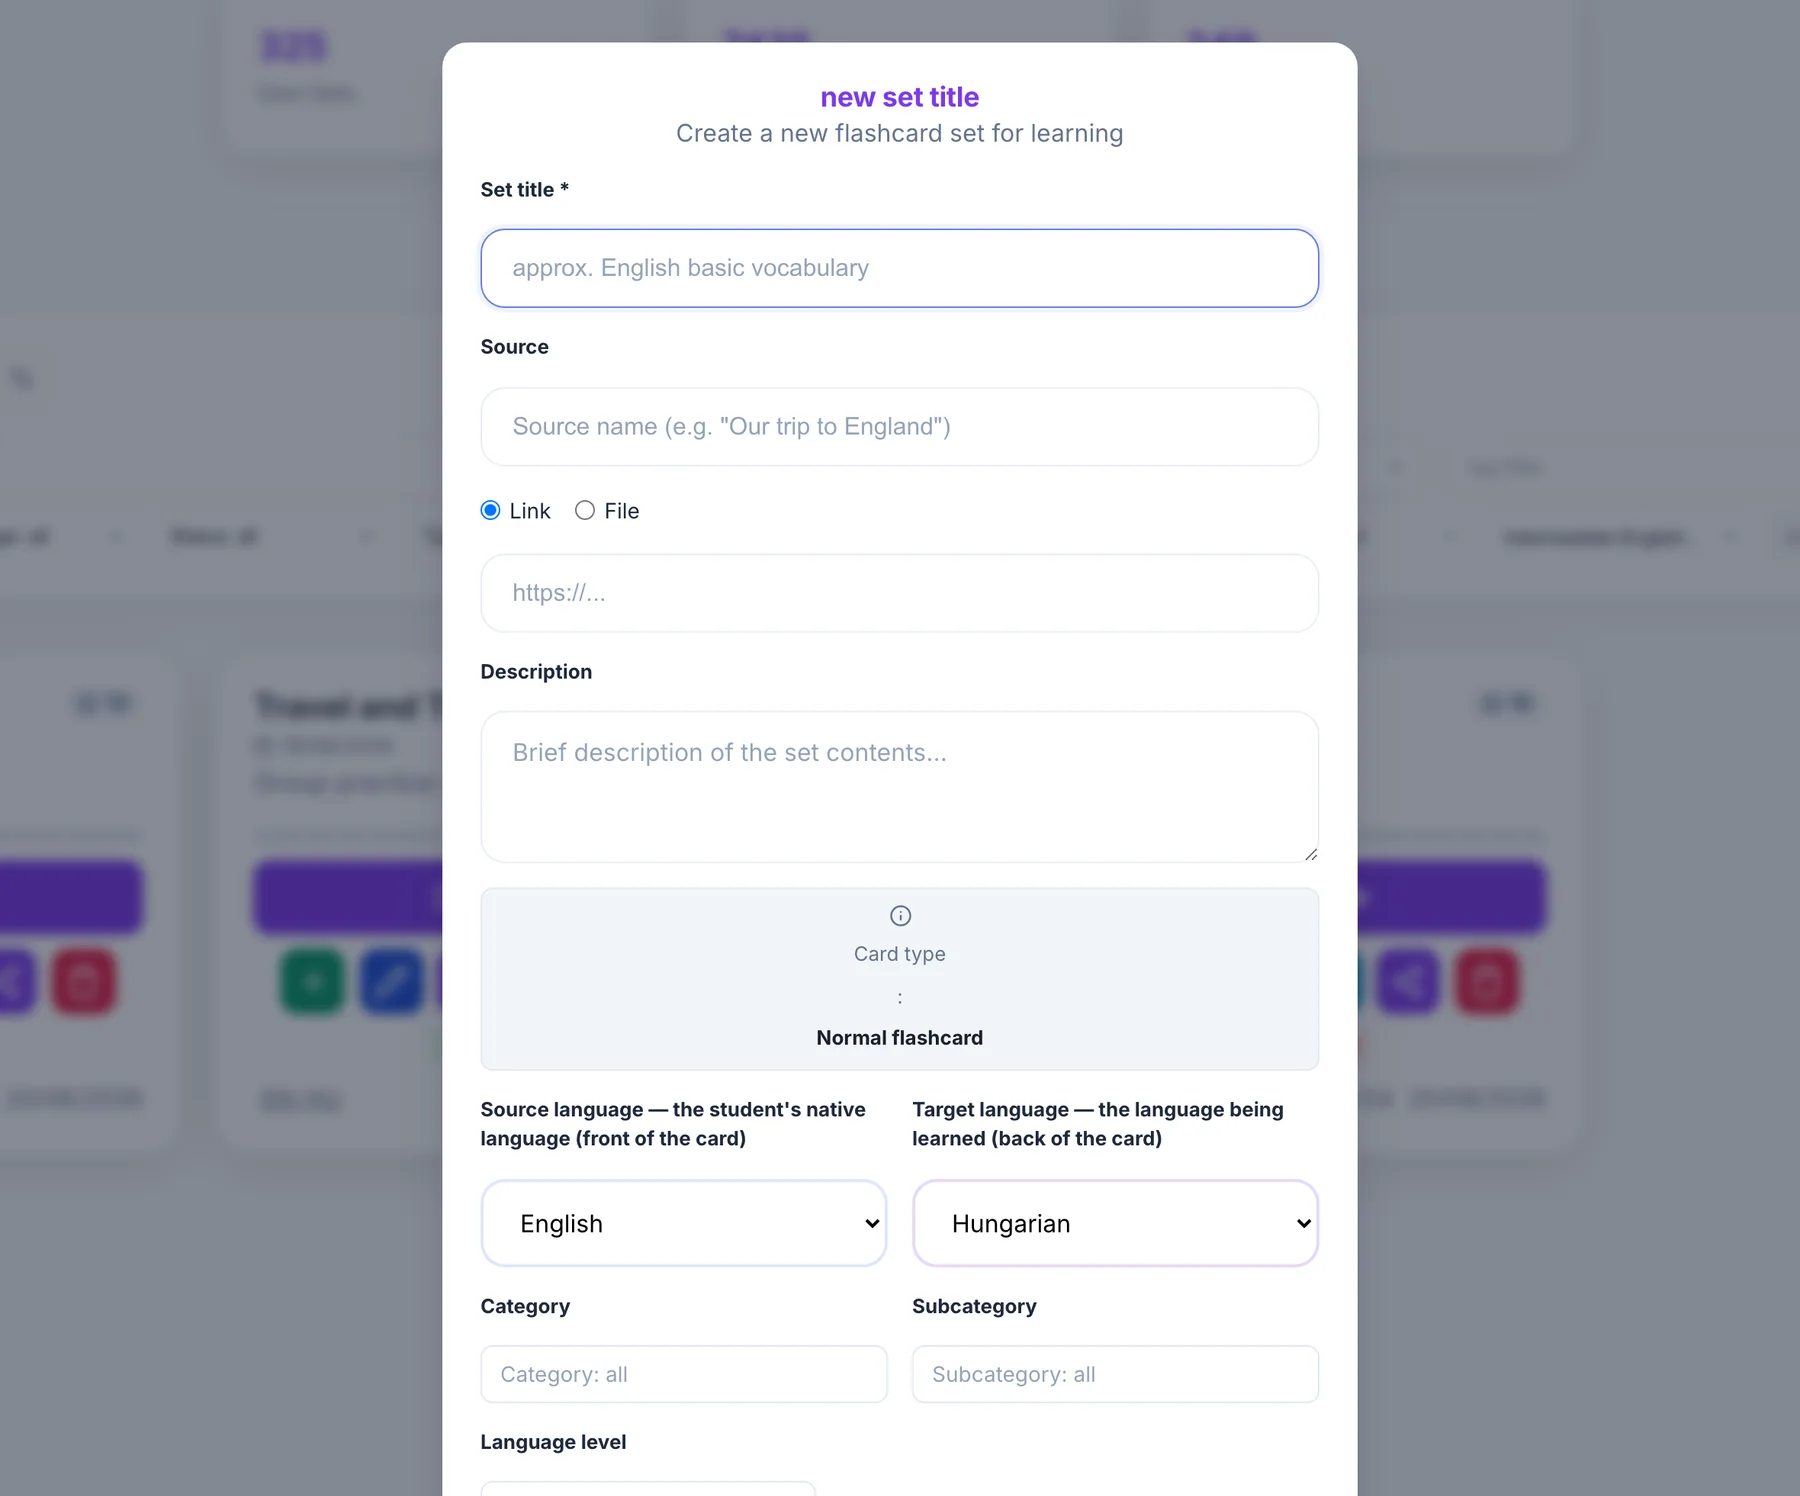
- In Sets, press Create New Set.
- Pick the card type, then pick Manually as the way to fill it.
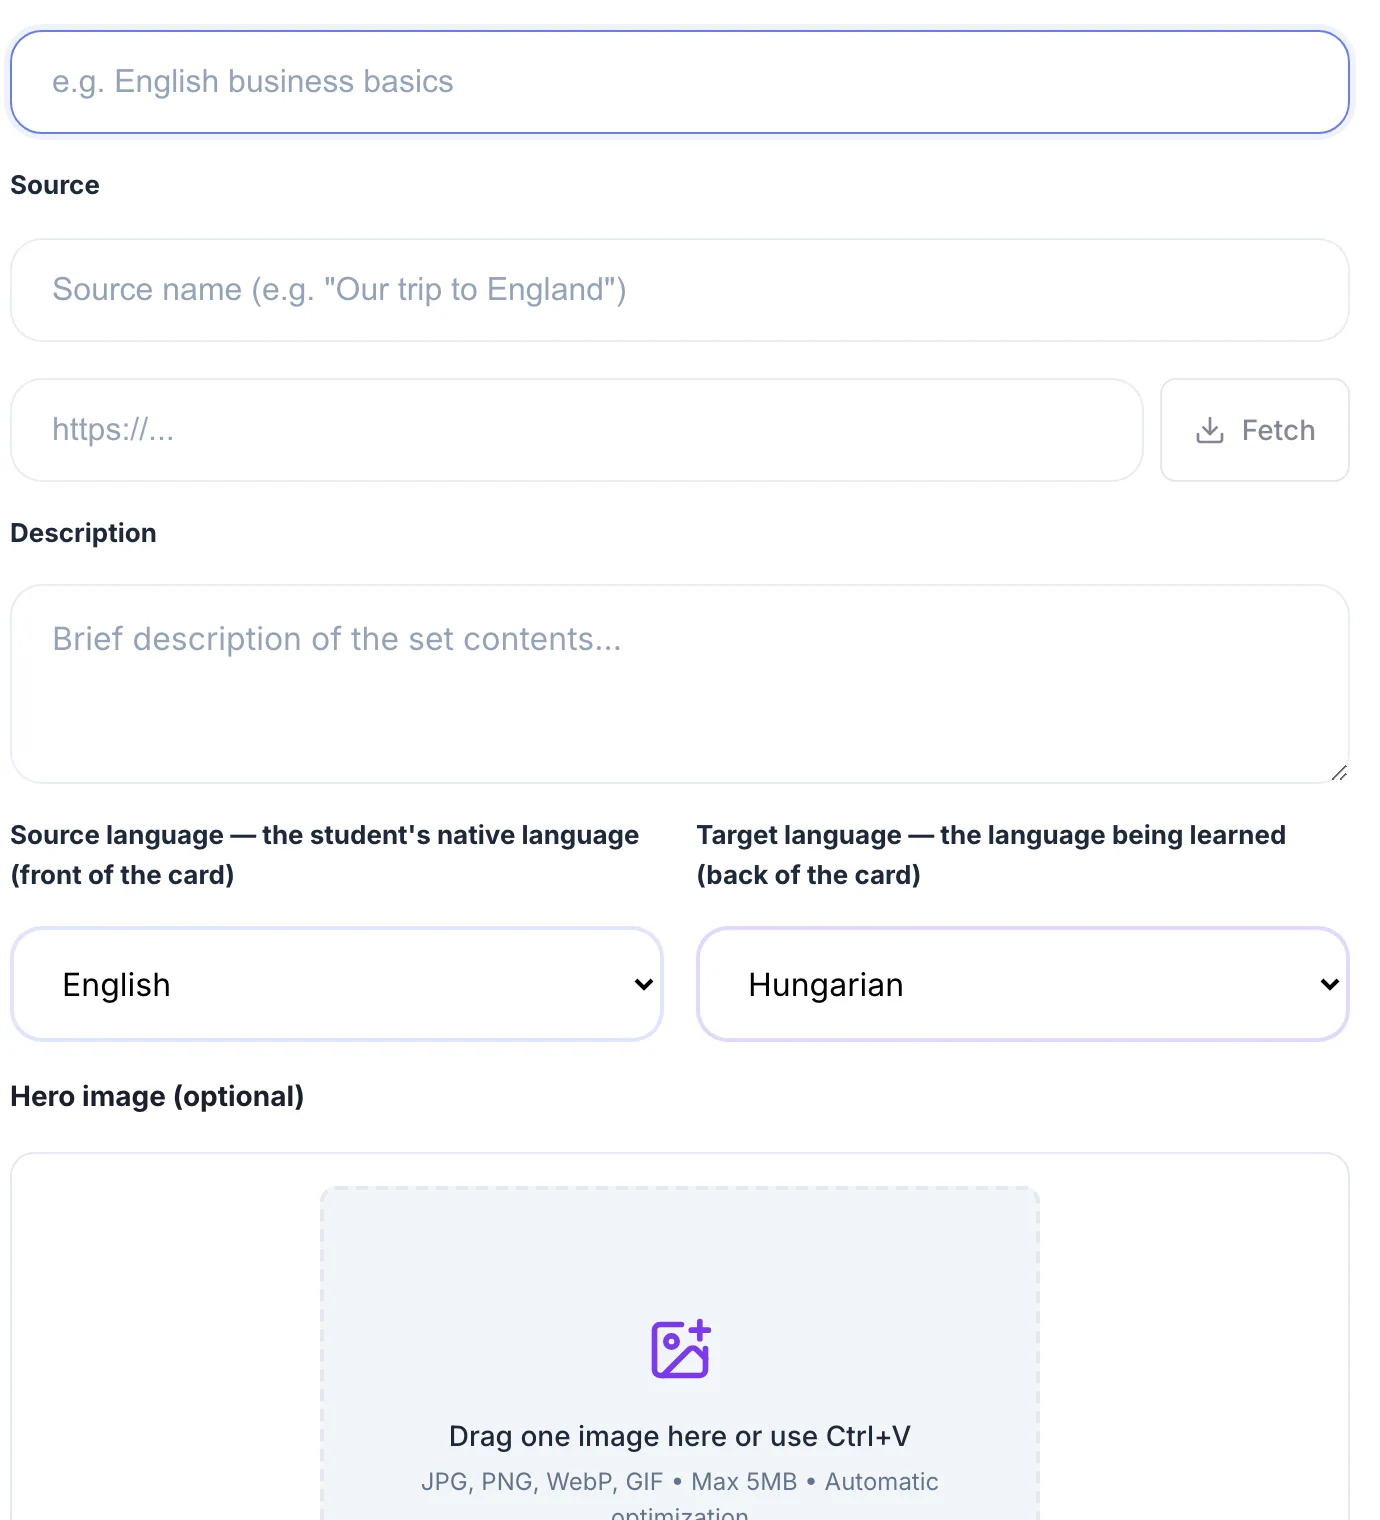
- Give it a name you will still recognise in six weeks — not just this week — and set the language pair.
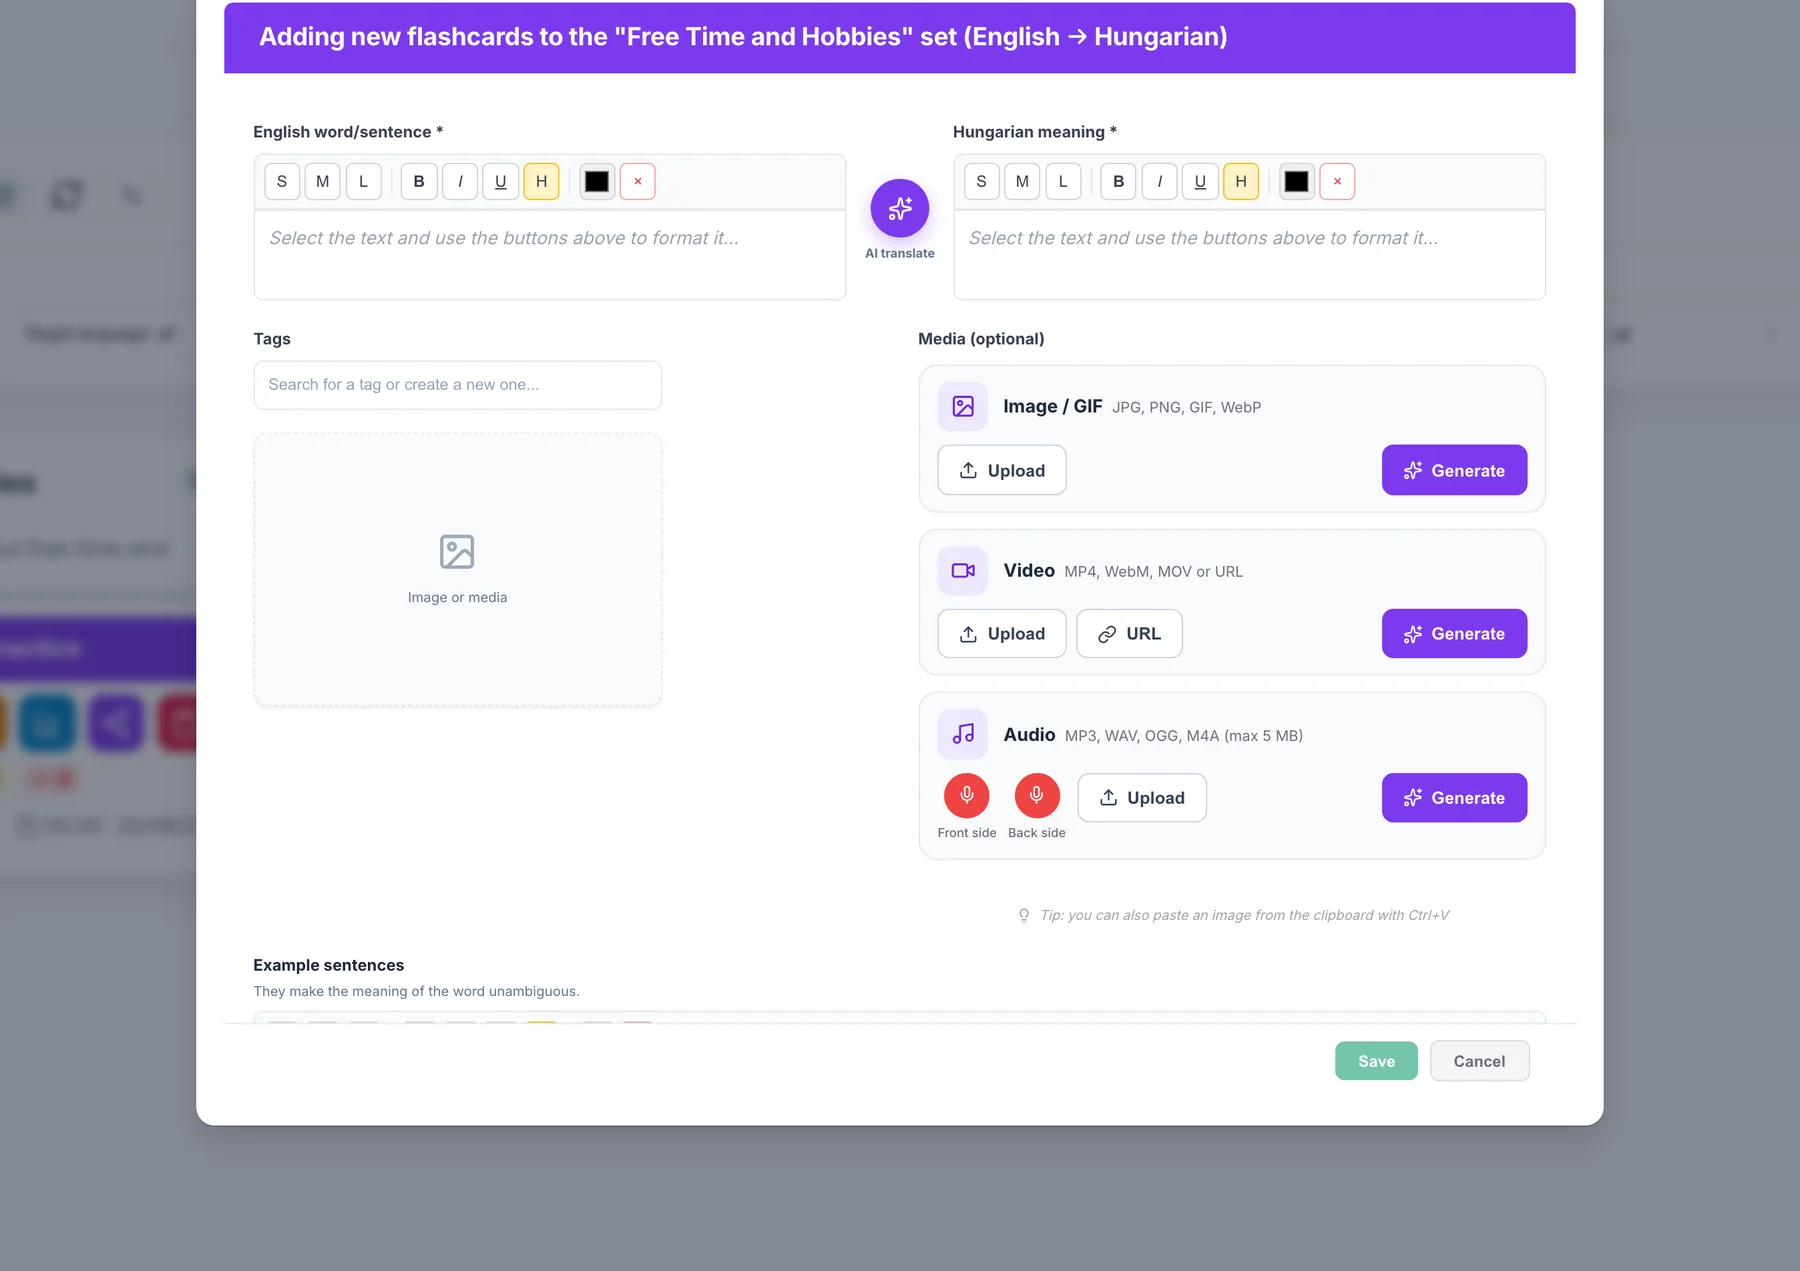
- Add cards. Type the word exactly as the student will meet it on the first side, the meaning they already have on the second, then Save.
- Tags are optional and worth the two seconds: one word can sit in several themes at once.
Why it works this way
Both sides are required, and the editor refuses to save with either one empty — a card with one side has nothing to test. The language pair decides which side is A and which is B, and the study screen's direction switch works off it, which is why it is the one thing you cannot casually change afterwards.
Fill a set without typing it
Three routes for material that already exists somewhere — a text, a dialogue you wrote, or years of sets on Quizlet.
What you are looking at
From source material reads a text you paste, a file you upload (txt, Markdown, PDF, Word, PowerPoint) or a public page you link, and proposes cards from it.
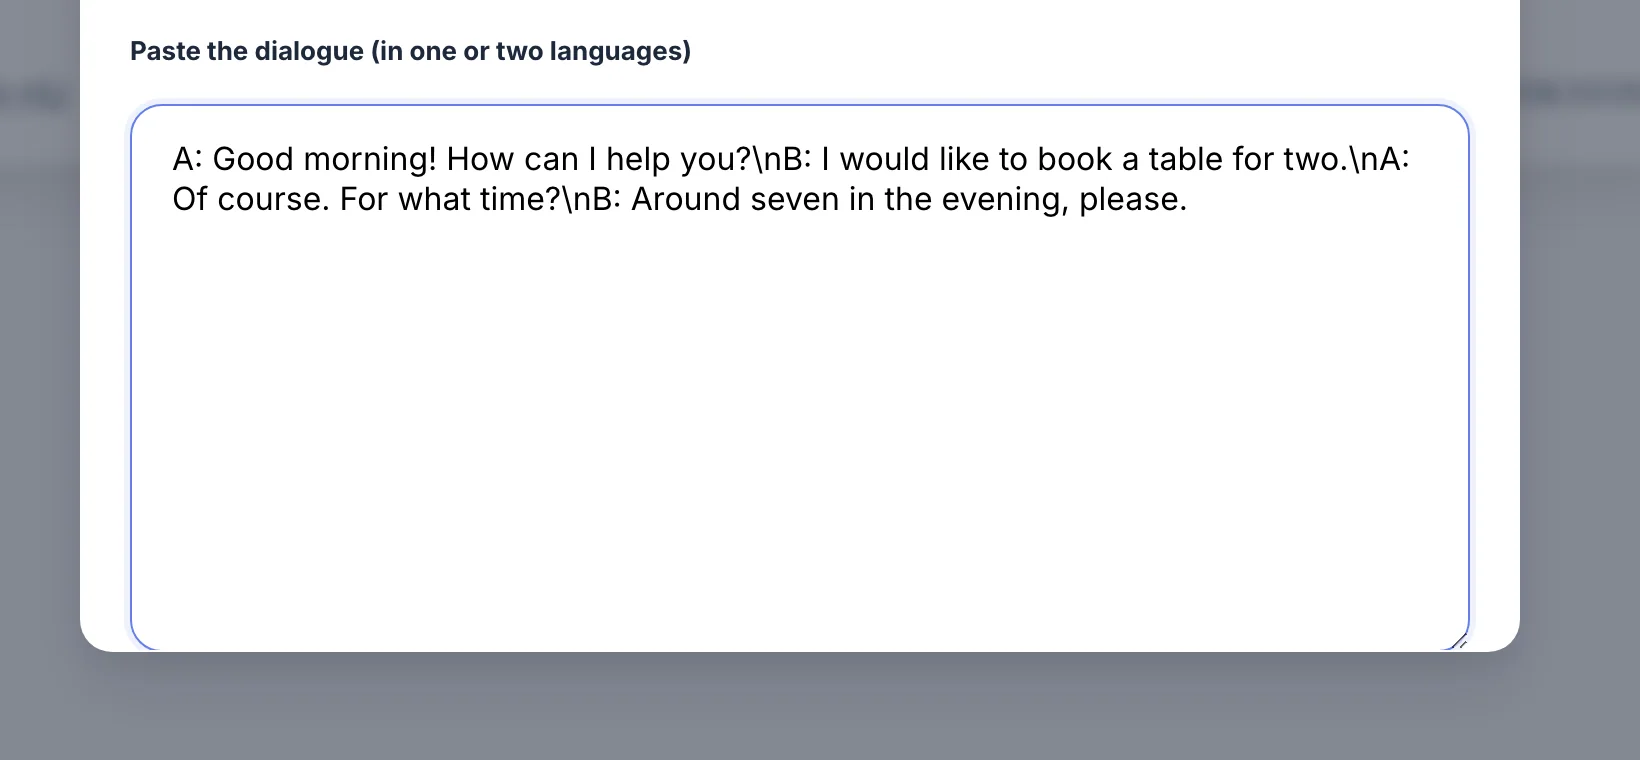
From a dialogue takes a conversation you already wrote and turns it into question cards — word for word, without inventing, dropping, merging or correcting anything you put there.
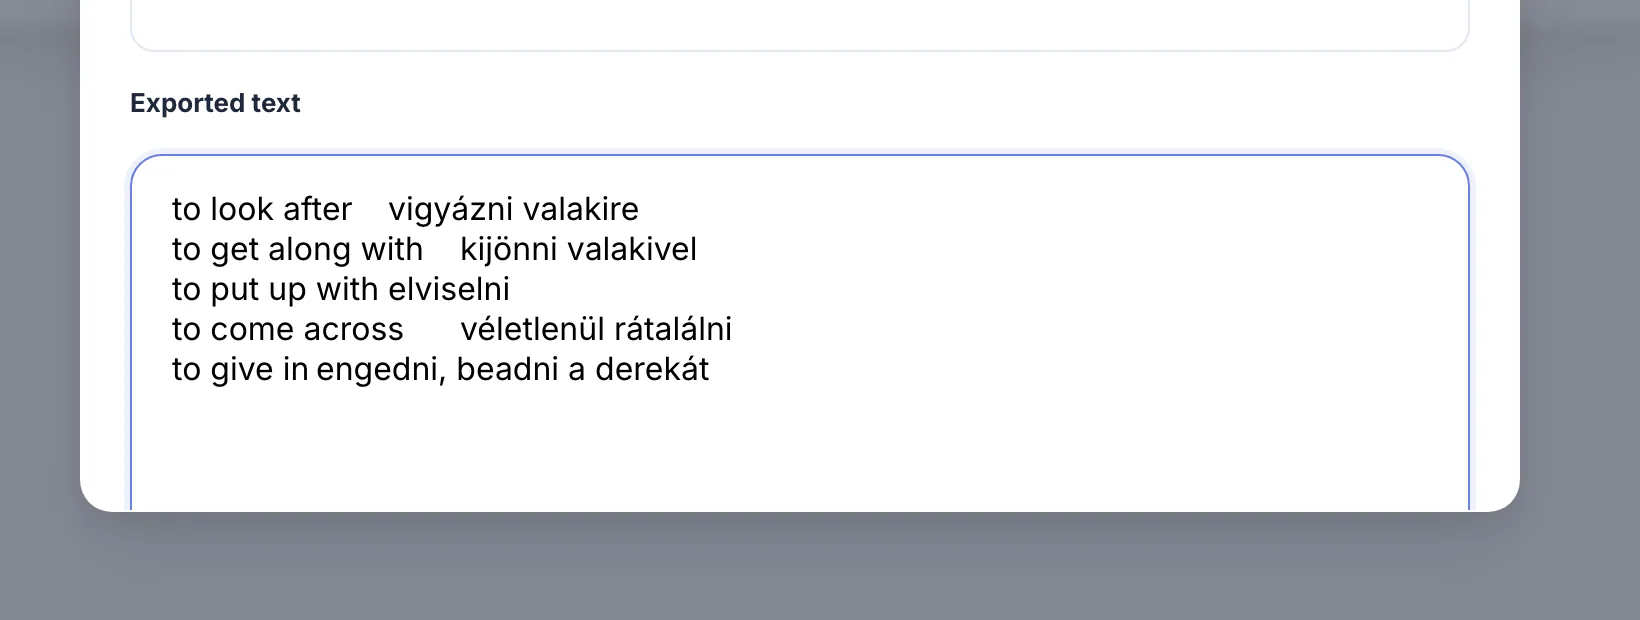
Quizlet import reads Quizlet's plain-text export. No AI is involved, nothing is sent anywhere, and it costs nothing: it is a parser running in your browser.
How to do it
- Choose the route in the same chooser you used for the manual set.
- For a text: paste, upload or fetch, then set the two languages, the CEFR level (A1–C2, or leave it open) and how many cards you want.
- For a dialogue: paste it in one or two languages. If every line is written twice, the turns are paired instead of split.
- For Quizlet: paste the export and check two things in the preview — the number of cards, and whether the sides landed the right way round.
- Read the proposal table, untick what your class does not need, and save what is left.
Why it works this way
Every route ends in a table you approve, never in a finished set. The generator is good at finding candidate vocabulary and has no idea which six words your class actually needs on Thursday — you do, and the table is where you say so. Generating spends credits by cards delivered; the dialogue route refuses to guess when the text is not a dialogue and names the reason instead.
Put a picture on a card
Upload one, or write a sentence and have it drawn — the sentence is the whole feature.
What you are looking at
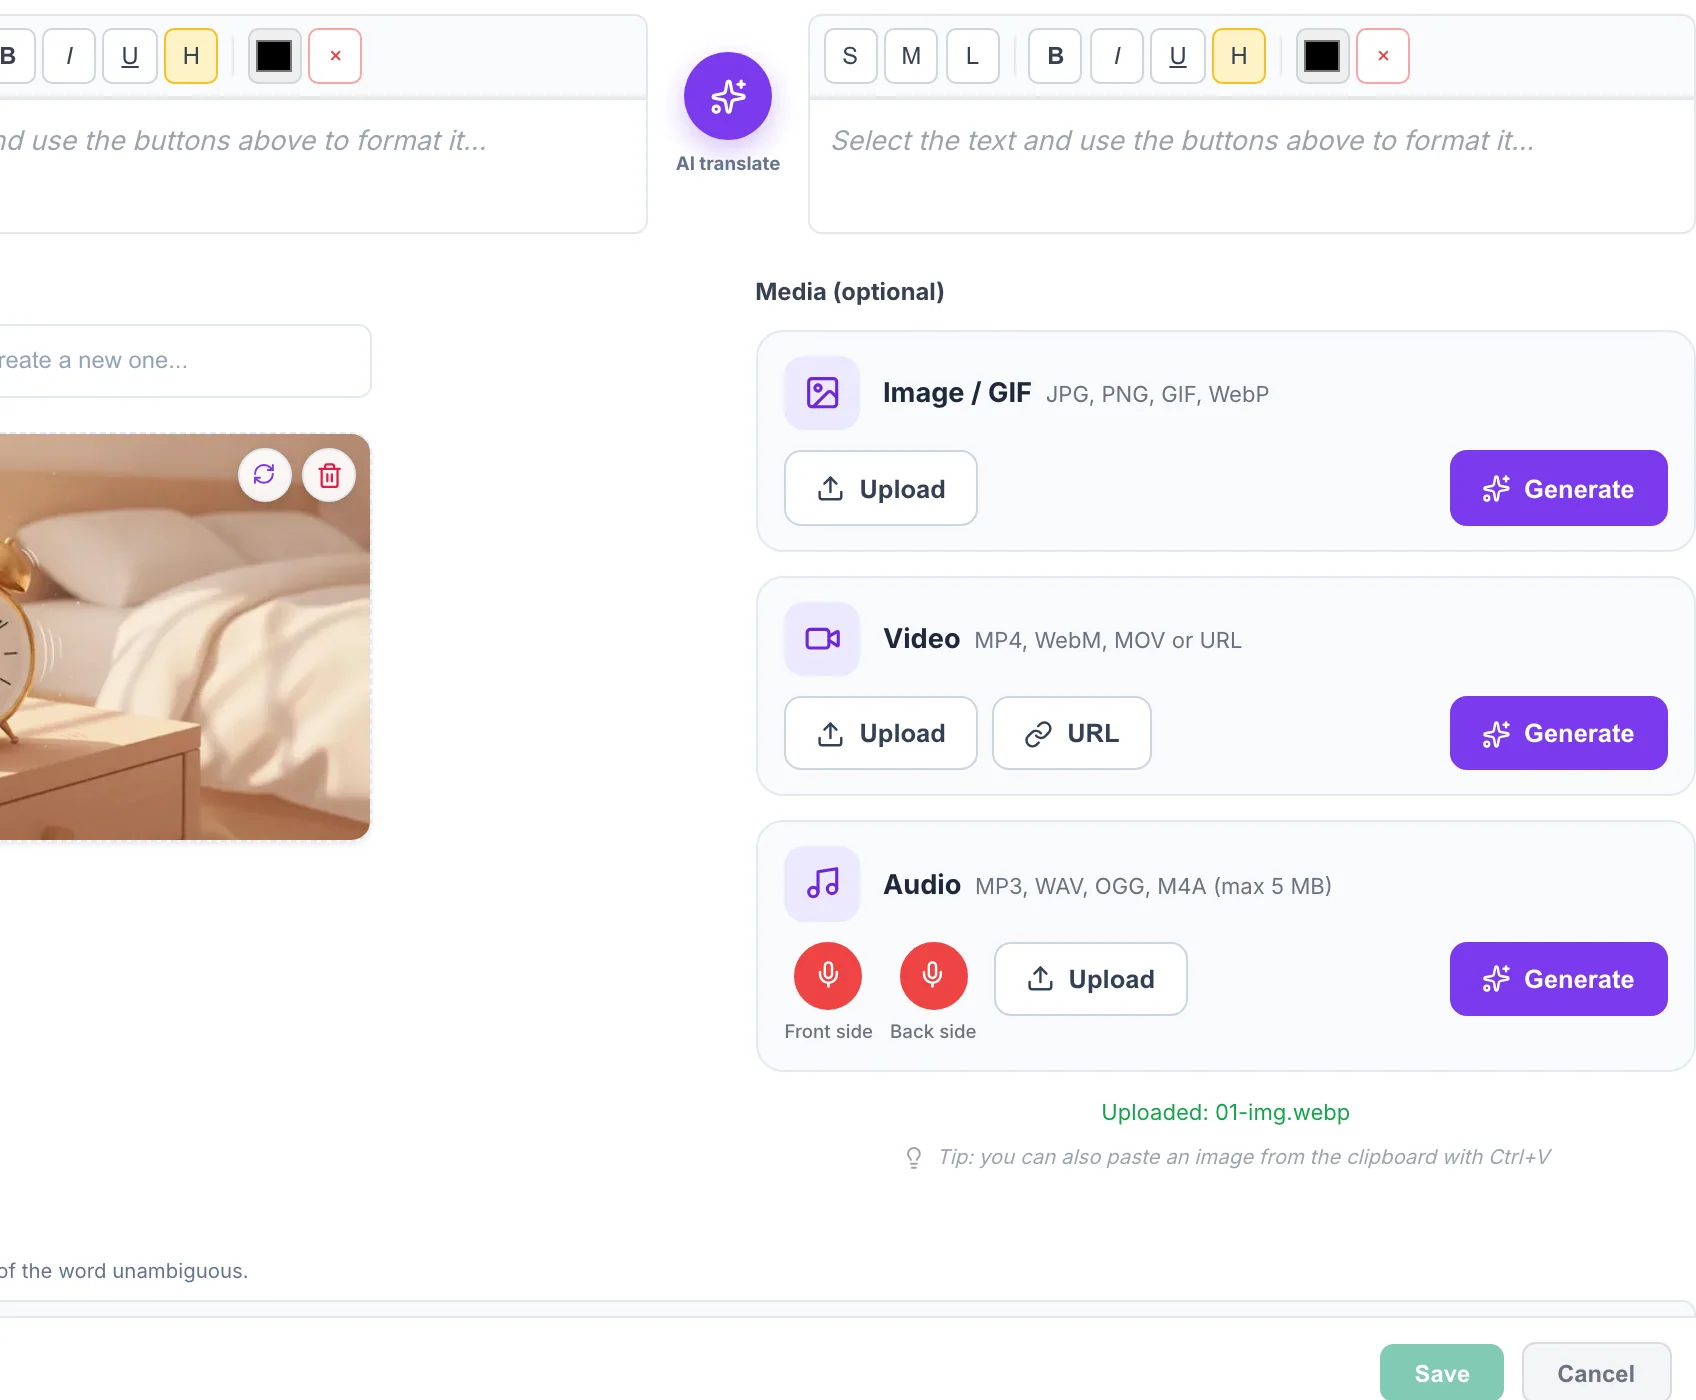
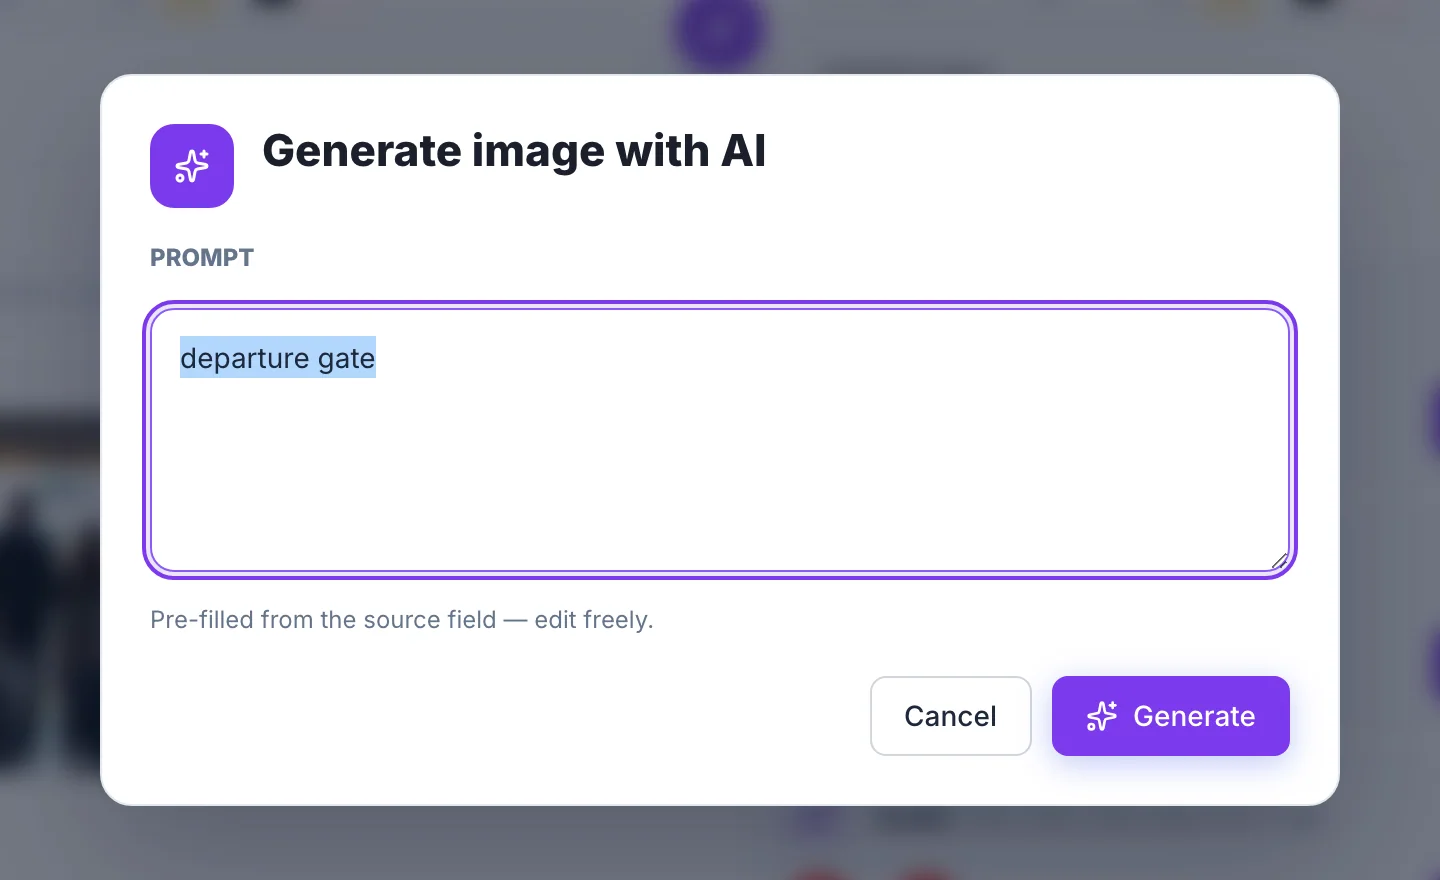
The image slot has two routes. Upload takes JPG, PNG, GIF or WebP from your own files. Generate does not start anything on the press: it opens a dialog with one field — the prompt — pre-filled with the card's own word.
How to do it
- Open a card in the editor and find the Image row in the media block.
- Upload a file, or press Generate to open the prompt.
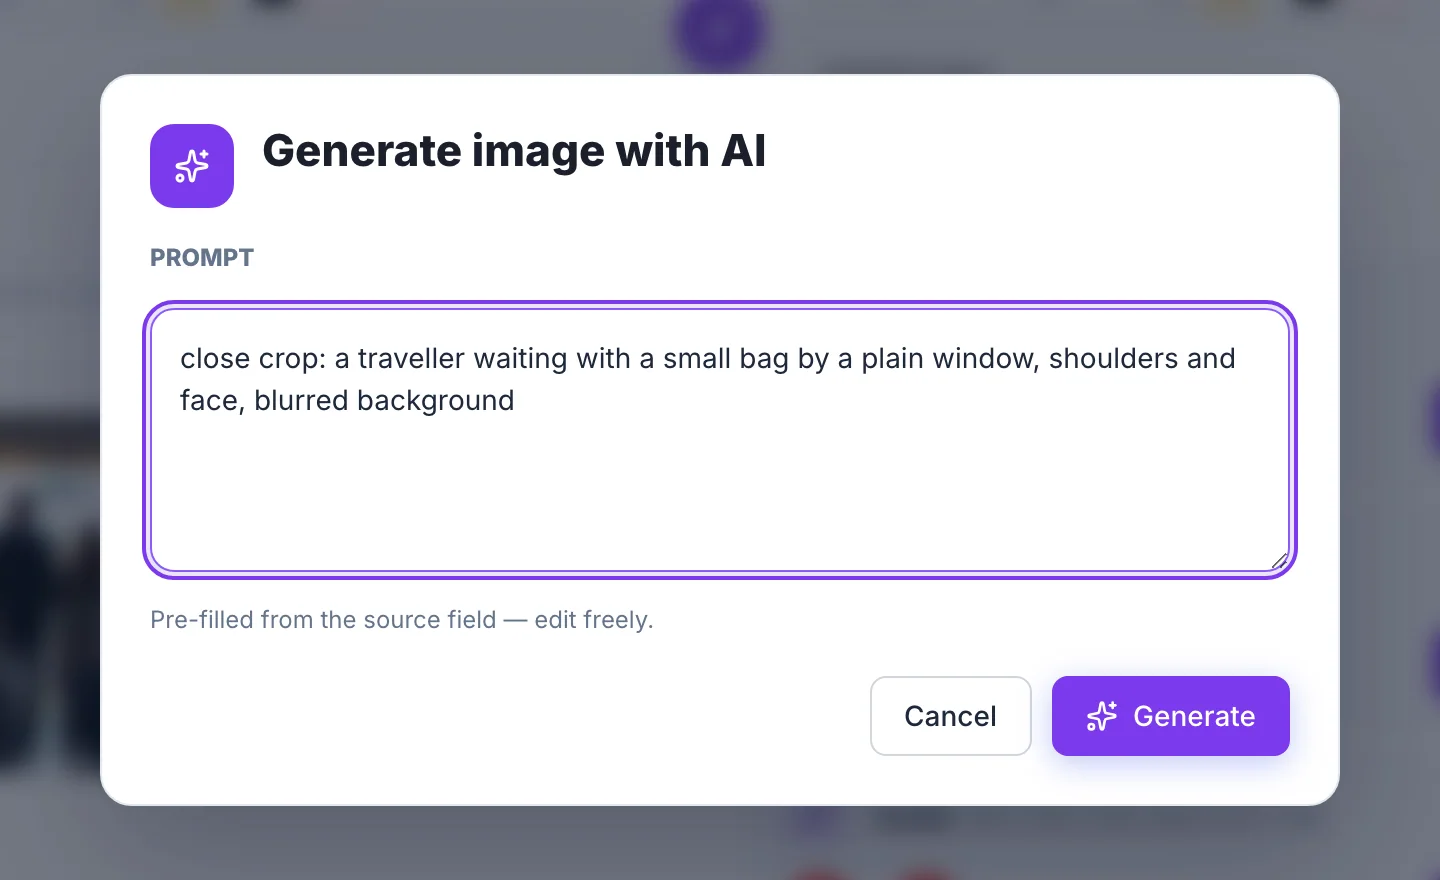
- Rewrite the pre-filled word into a scene. Describe one person, one object, a plain background.
- Send it — this is the only step that spends a credit. Cancel costs nothing.
- Come back later and the prompt you sent is waiting in the field, so you adjust a detail instead of writing it again.
Why it works this way
One measured lesson beats any general advice about prompts. If the natural scene of your word is full of signage — an airport, a shop, a street — the picture comes back with unreadable lettering across it. Asking for “no text” made it worse: the model answered with a bigger, brighter departure board covered in nonsense. A close crop came out clean on the first try.
And some words have no picture. For an idiom, if the image cannot separate the idiomatic meaning from the literal one, leave it out — a card with no image is not a card with a hole in it. The text expands and fills the space.
Give the card a voice
One press reads both sides, each in the language its own side is written in.
What you are looking at
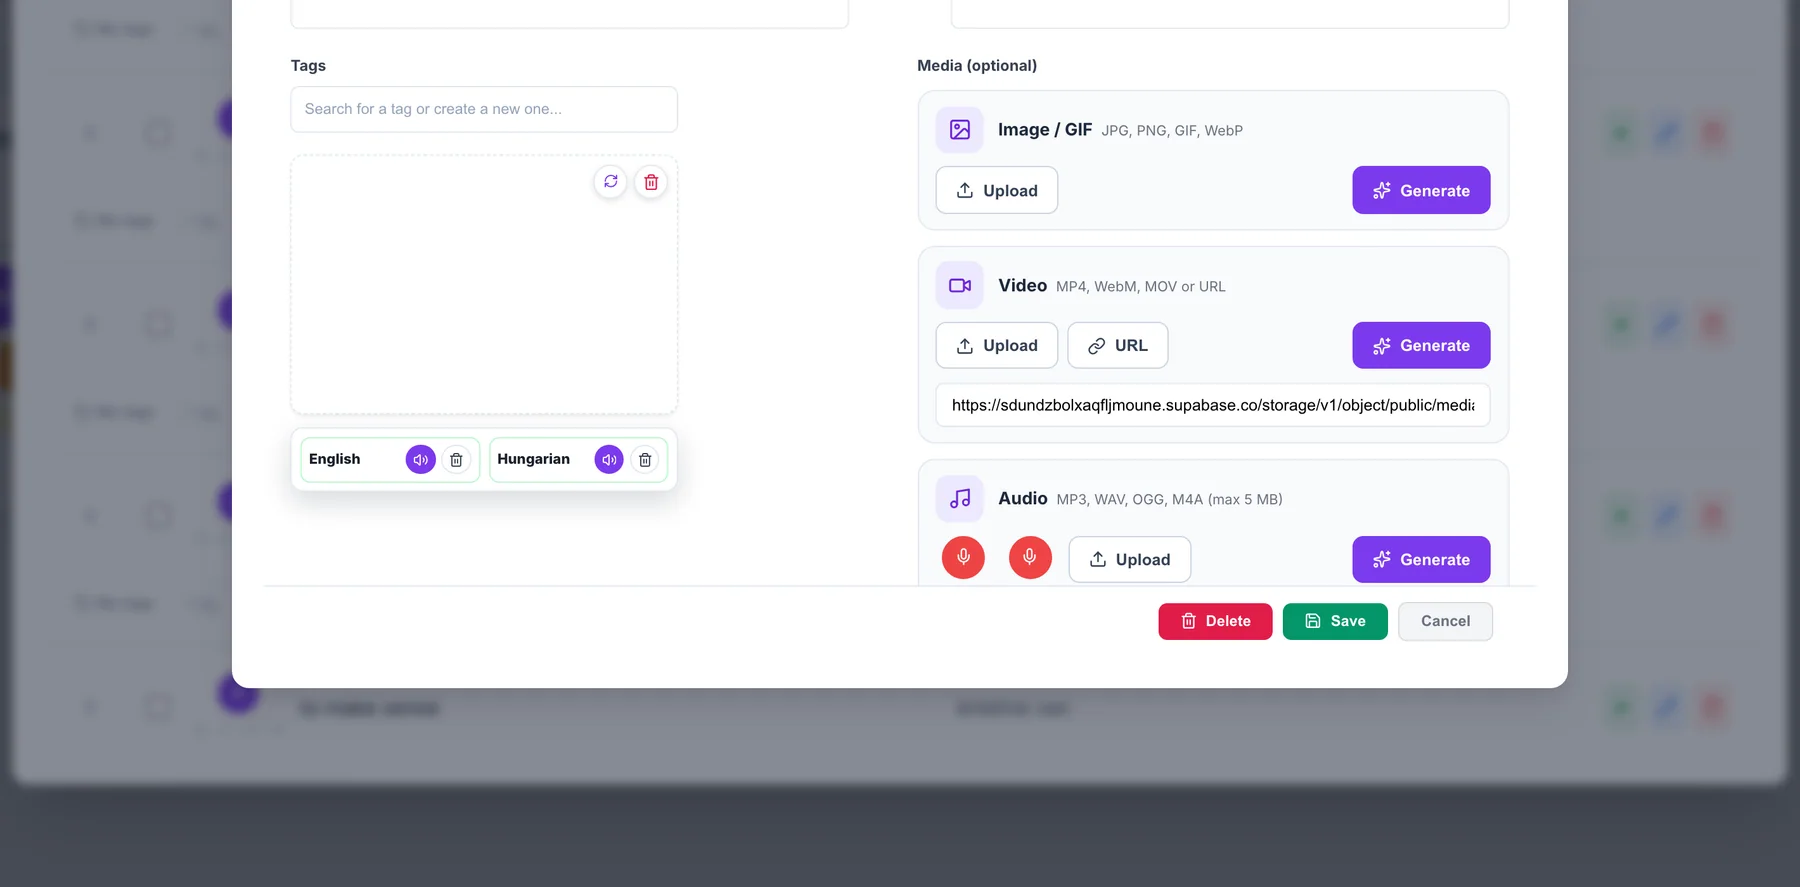
Sound lives in two different places on this screen, and mixing them up is the usual confusion. On the right, in the media block, sound is created: two microphones (front side and back side), Upload, and Generate. On the left, under the picture, each stored sound gets its own row, named after the language it speaks, carrying exactly two buttons — play and delete.
How to do it
- Write both sides of the card first. The text is what gets read out — the media block has nothing to do with it.
- Press Generate in the Audio row. Both sides are read at once, each in its own language.
- Play them back from the rows under the preview, so you hear what your student will hear.
- To redo one, delete it on its row and press Generate again.
- On an empty card the button stops and says so in red instead of spending anything — there is no text to read.
Why it works this way
Keeping a reading and replacing one are different decisions, and only the second costs credits — so the shortcut that would blur them was removed on purpose. If a generated pronunciation comes out wrong, and roughly one in a hundred does, record it yourself with the microphone: your students hearing your voice is not a downgrade.
A whole set at once
Forty cards, one at a time, is an evening. It does not have to be — but read the number first.
What you are looking at
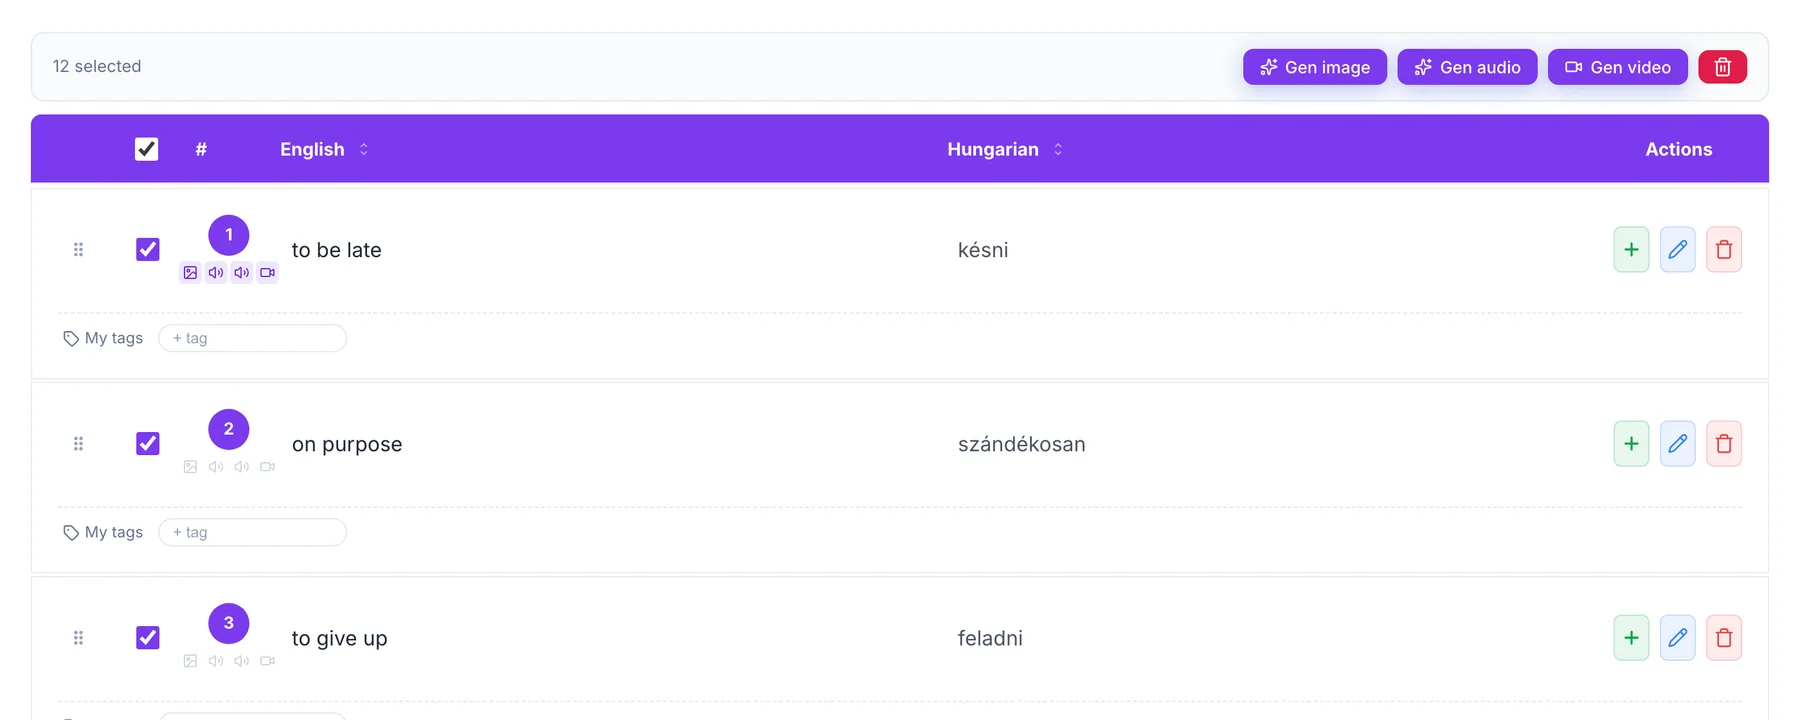
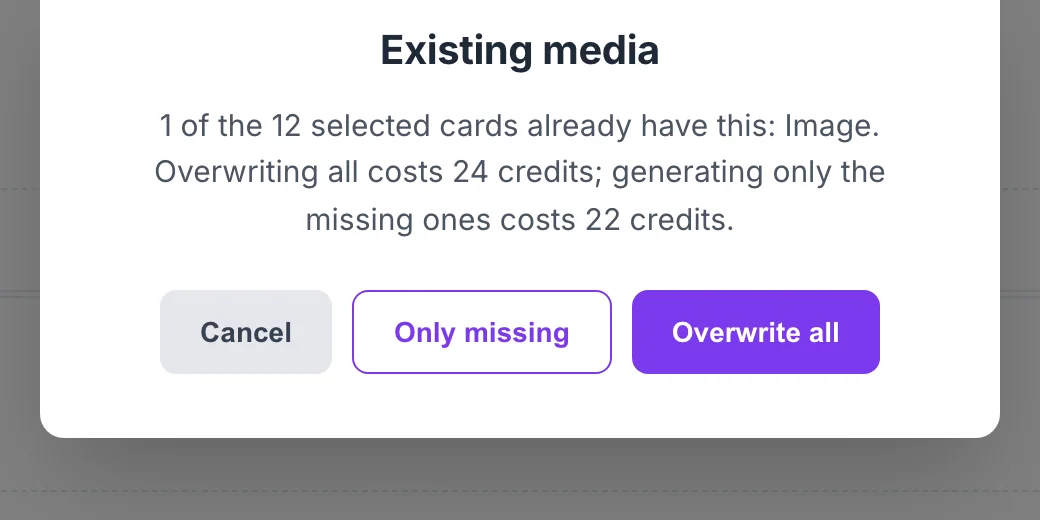
The card list lets you tick cards and generate image, audio or video for the whole selection. Before anything runs, a confirmation shows the exact price — and if some of the selected cards already have that media, a second question with both prices side by side.
How to do it
- Open the set's card list and tick the cards you want.
- Press Gen image, Gen audio or Gen video.
- Read the number as items, not cards. For images the two are the same; for audio they are not, because a card has two sides.
- Choose gaps-only or overwrite, then start it.
- Leave the page if you like. It runs on the server and reports what succeeded, what was skipped and what failed.
Why it works this way
The dialogue exists because the surprise is expensive: twenty-two cards is sixty-six items across the three media types, and regenerating an image that already exists costs exactly what the first one did.
The part nobody puts in a product tour: often you should not generate at all. Dialogue cards rarely need pictures — the exchange itself is the content. Generate what earns its place on the card, and keep the credits for the words where a picture does the teaching.
Make a group, invite a student
Ten seconds for the group. One field for the invitation — with a decision hidden behind it.
What you are looking at
The group is the card everything else hangs off: students are invited into it, sets are assigned to it, and the progress panel underneath fills itself as they study. The free teacher plan allows one group; the paid plans allow ten and fifty.
The invitation is a single field — the student's email address — checked as you type.

How to do it
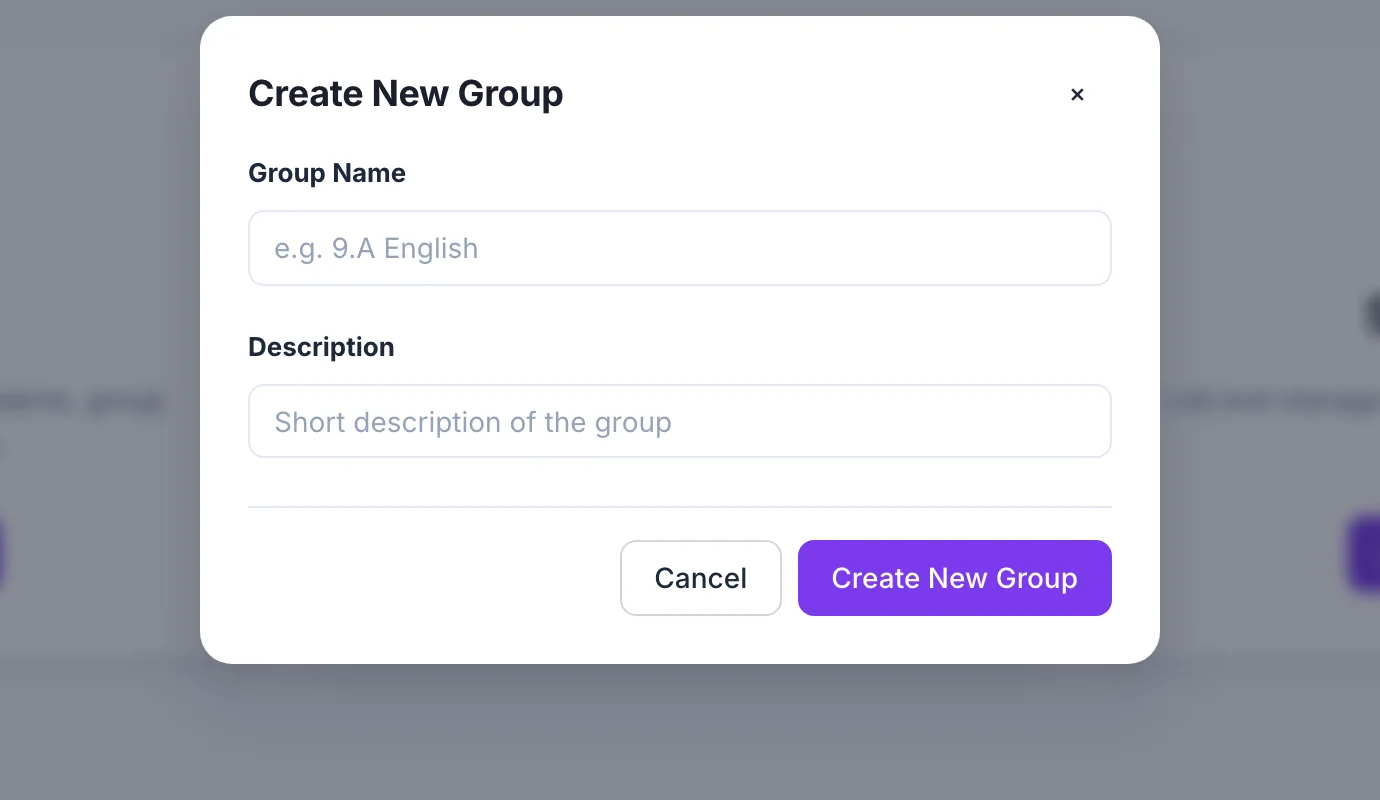
- Groups → Create New Group. Name it, describe it if you want, create it.
- Type the student's address. If they are already registered, their name comes back and nothing else is asked.
- If the address is new, fill in the name and choose the language of the invitation. Both are required.
- Send it. It sits in the pending list, visible, until it is accepted.
Why it works this way
The language box starts empty because it used to inherit whatever language you happened to be working in — which is how a Hungarian invitation once went to a student who did not read Hungarian. Your interface language is not evidence about the person you are writing to, so the app refuses to guess. An invitation nobody understands is an invitation nobody accepts.
Hand out the material
To a class, to one person, or to somebody with no account at all.

What you are looking at
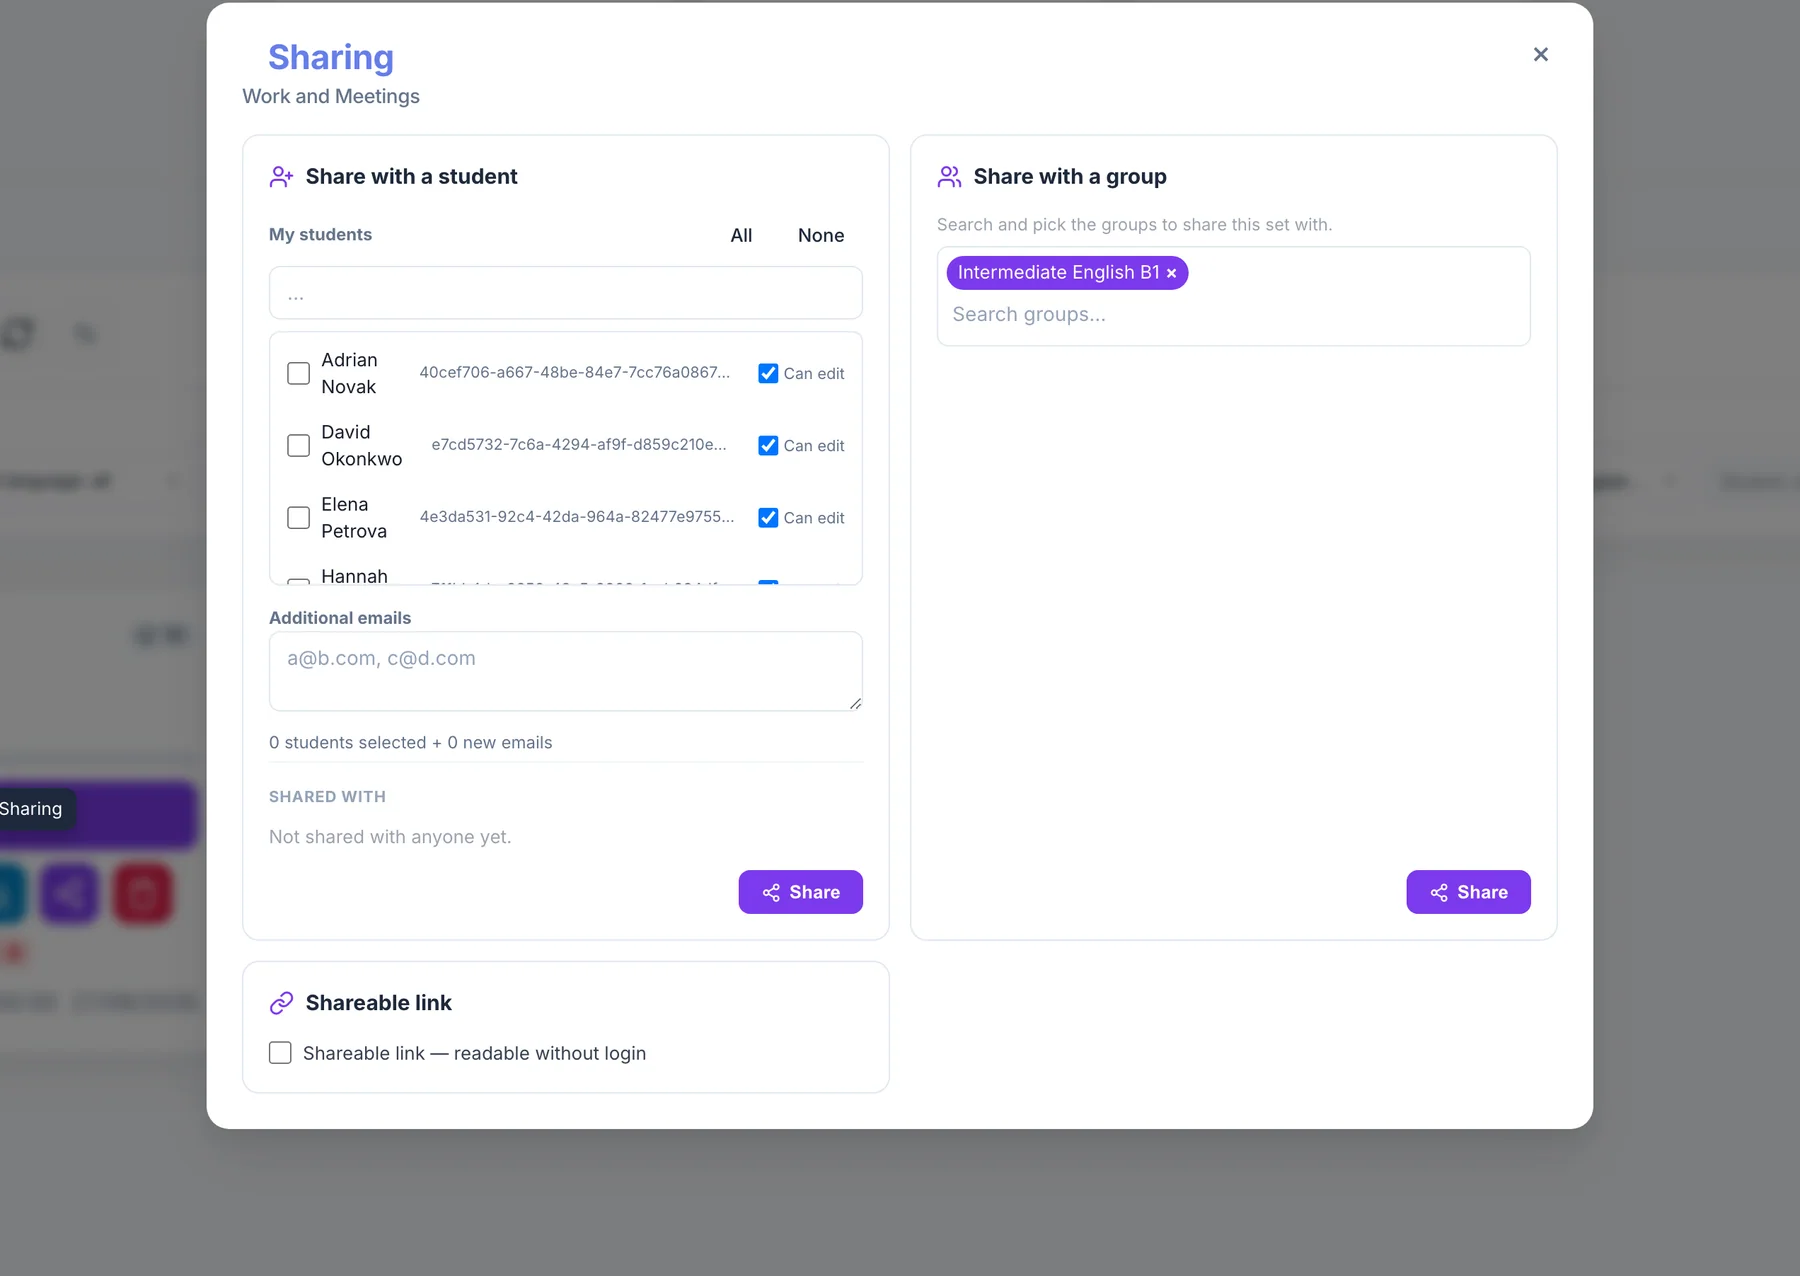
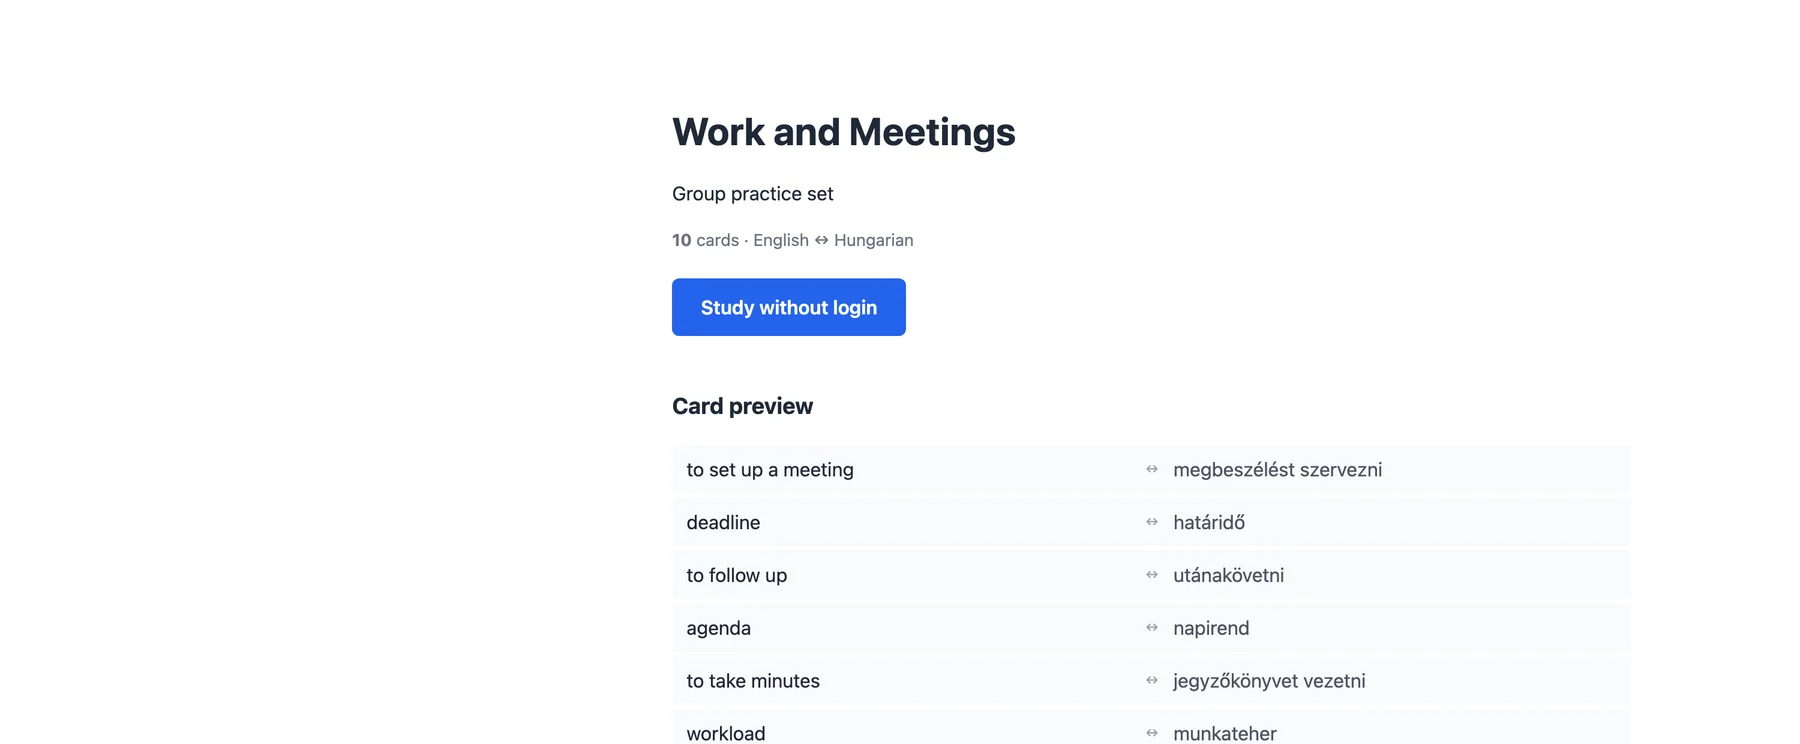
Three routes out of the same material. Assigning gives a whole group access. Sharing gives it to named individuals — the route for one-to-one teaching, where a group would be overhead you never asked for. The public link gives it to anyone who has the address, with no account at all.
How to do it
- Group: open the group's assign panel, pick the set from the dropdown, assign. Every active member has it on their own dashboard immediately.
- One student: open the sharing panel, tick the people who should get it. Someone new goes in as an email address, with the same name-and-language rule as an invitation.
- Turn the edit permission off, row by row, for material a test is based on — leave it on for a glossary you are building together.
- Public: flip the switch in the share modal. There is no save button; the switch is the save, and turning it off kills the link.
Why it works this way
Assigning writes a single row, and that row is the access — no copies are made. There is still exactly one set, and it is still yours, so a card you fix tonight is the card they study tomorrow. Take the access back and it leaves with the row; their progress data stays where it is.
The public link is genuinely public: a parent can sit down with their child and use your cards, and nothing they do is recorded anywhere. That is the point of it.
What your student actually does
Worth doing once yourself, because everything you assign lands on this screen.
What you are looking at
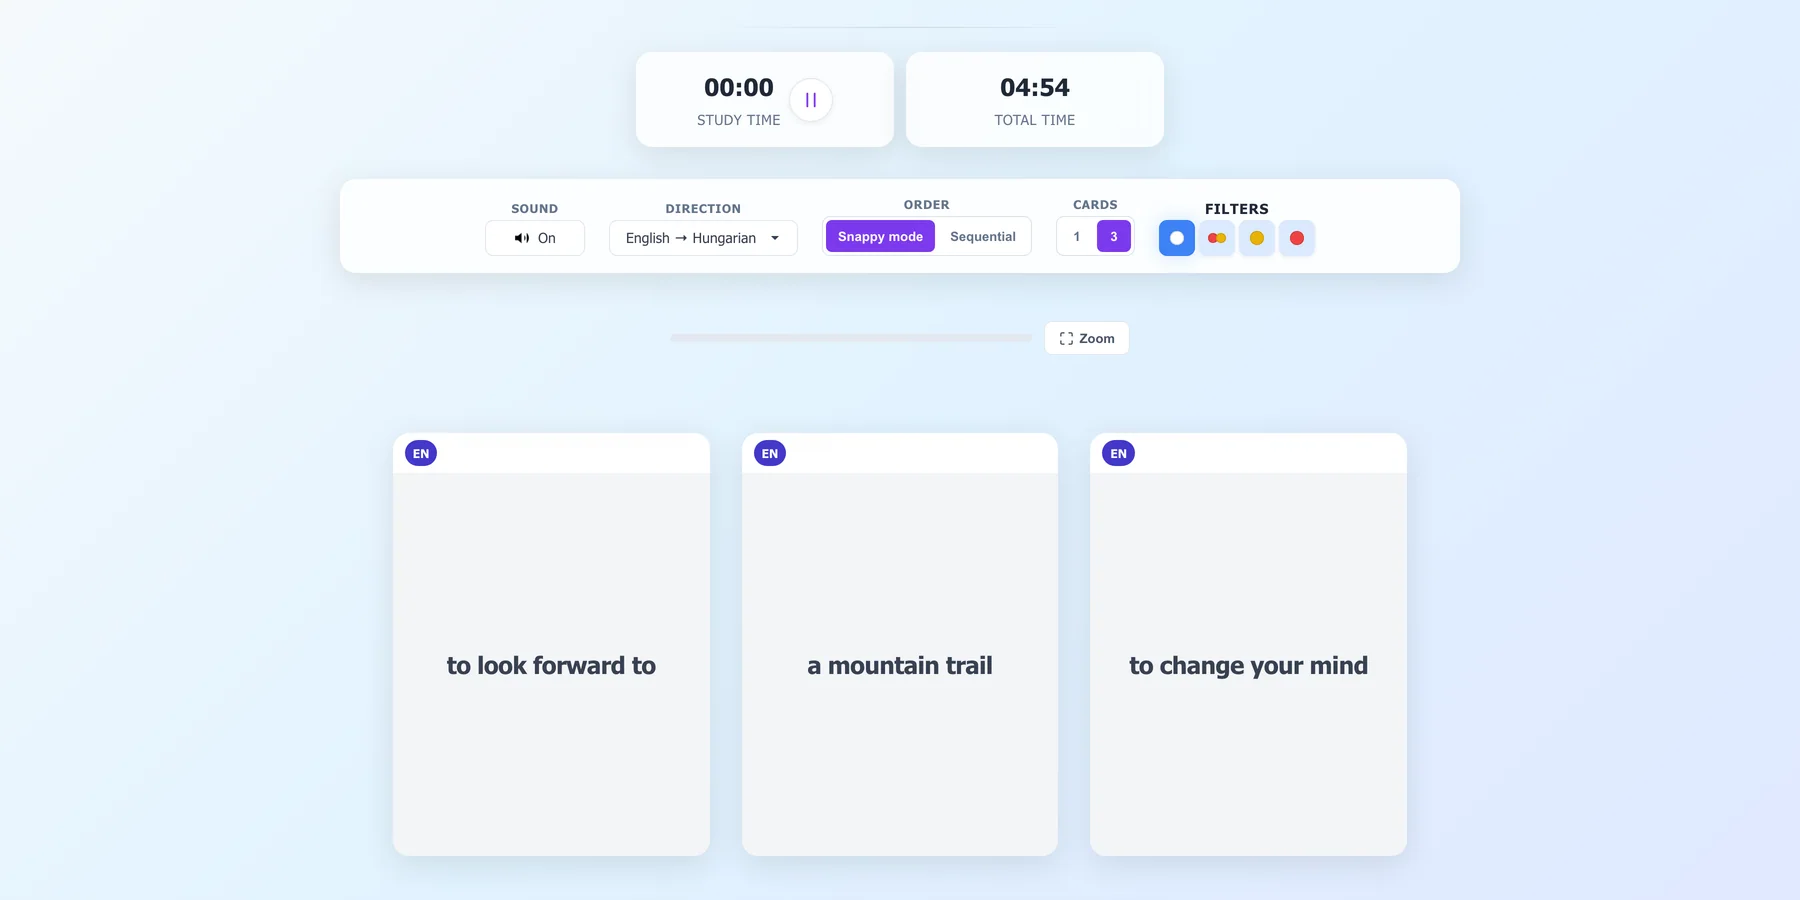
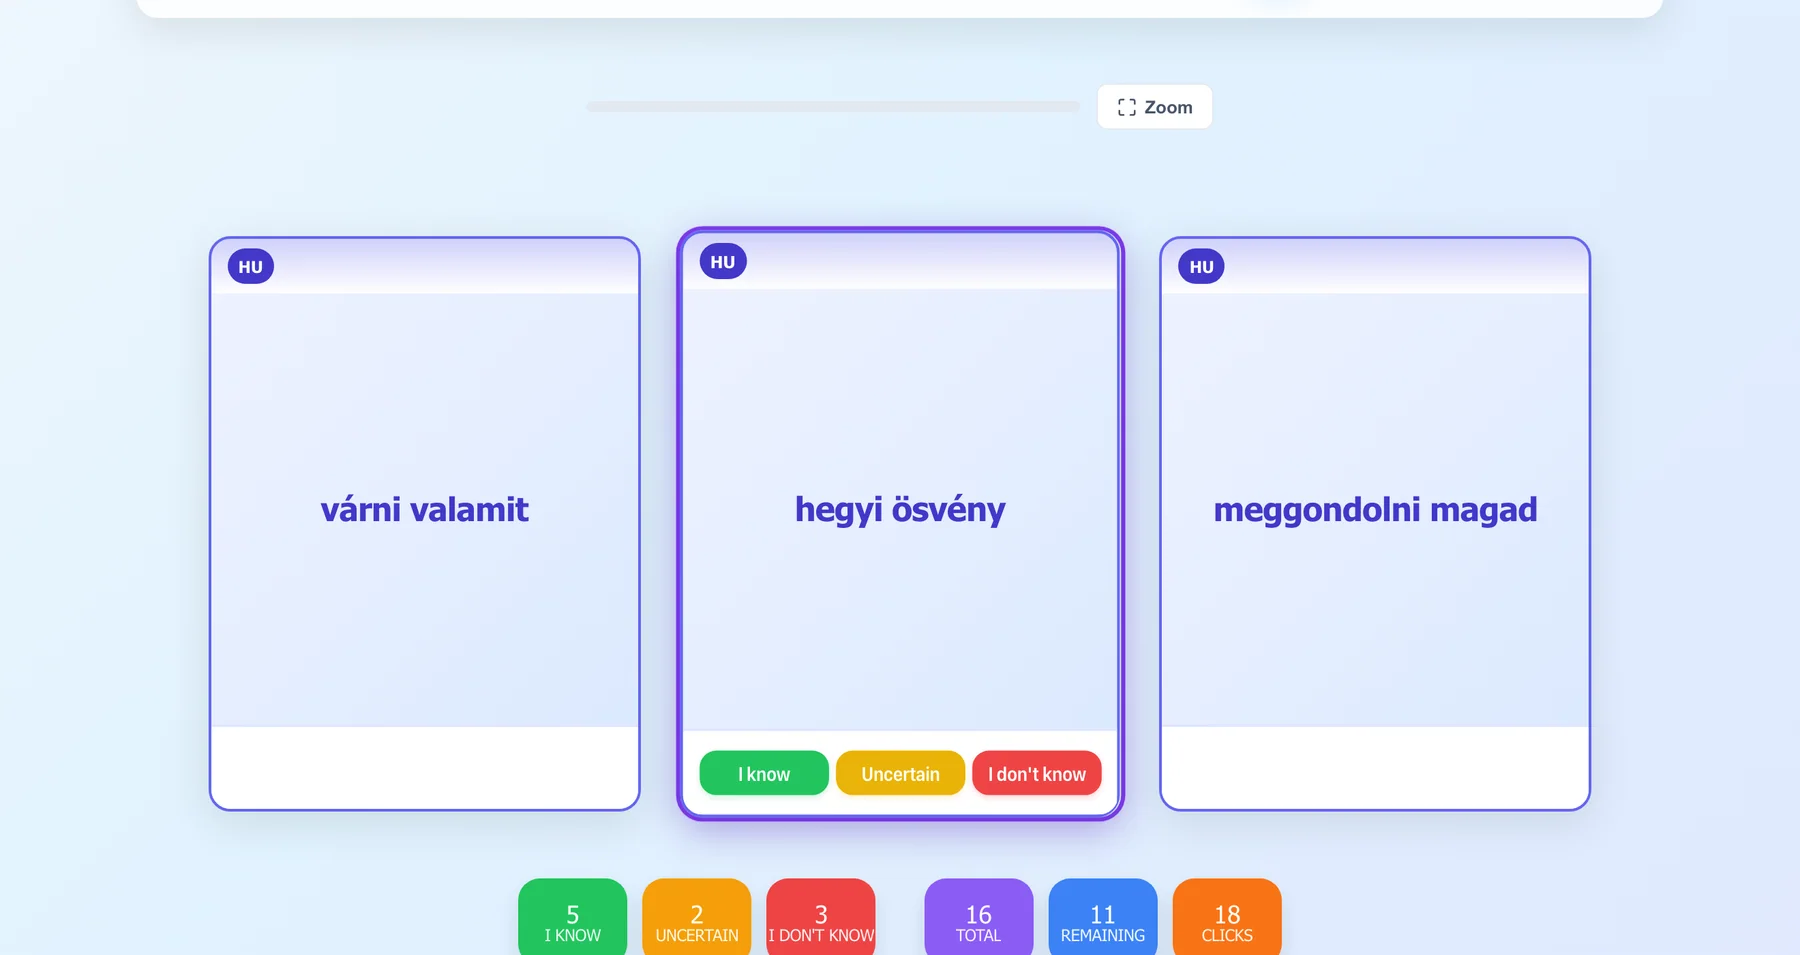
Three cards, two clocks, and a row of controls. Only the card the student taps is answered; the other two land face up and are not recorded anywhere. Underneath the tapped card, three buttons — I know, Uncertain, I don't know.
How to try it
- Open one of your own sets with Start practice.
- Tap a card and answer it. The next three deal immediately.
- Look at the six counters under the round — every one of them opens the actual list of words behind it.
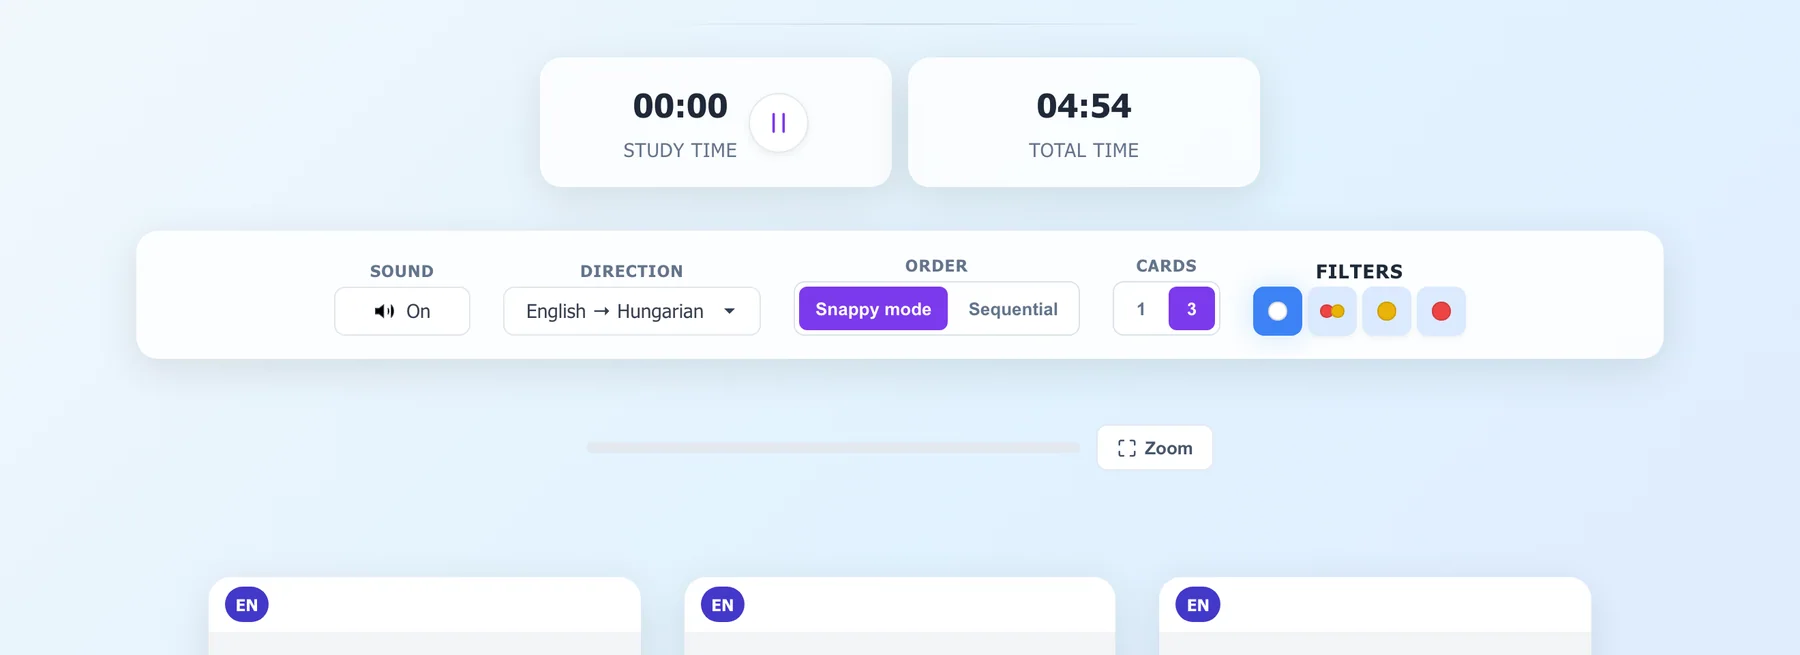
- Try the controls: card count, order, filters, direction, sound, zoom, and the pause button on the clock.
Why it works this way
The two cards nobody answered are still seen, and that peripheral exposure is the reason three are dealt instead of one. Reaction time is recorded with every answer, but it does not move the schedule — only the button does, which keeps the rule something you can explain to a student in one sentence.
One control is worth mentioning to them by name: the pause button on the clock. A student who leaves the tab open over lunch comes back to an hour of study time they did not do, and every progress screen you have is built on that number.
See who is actually working
Three levels of detail: twenty students, one student, one word.
What you are looking at
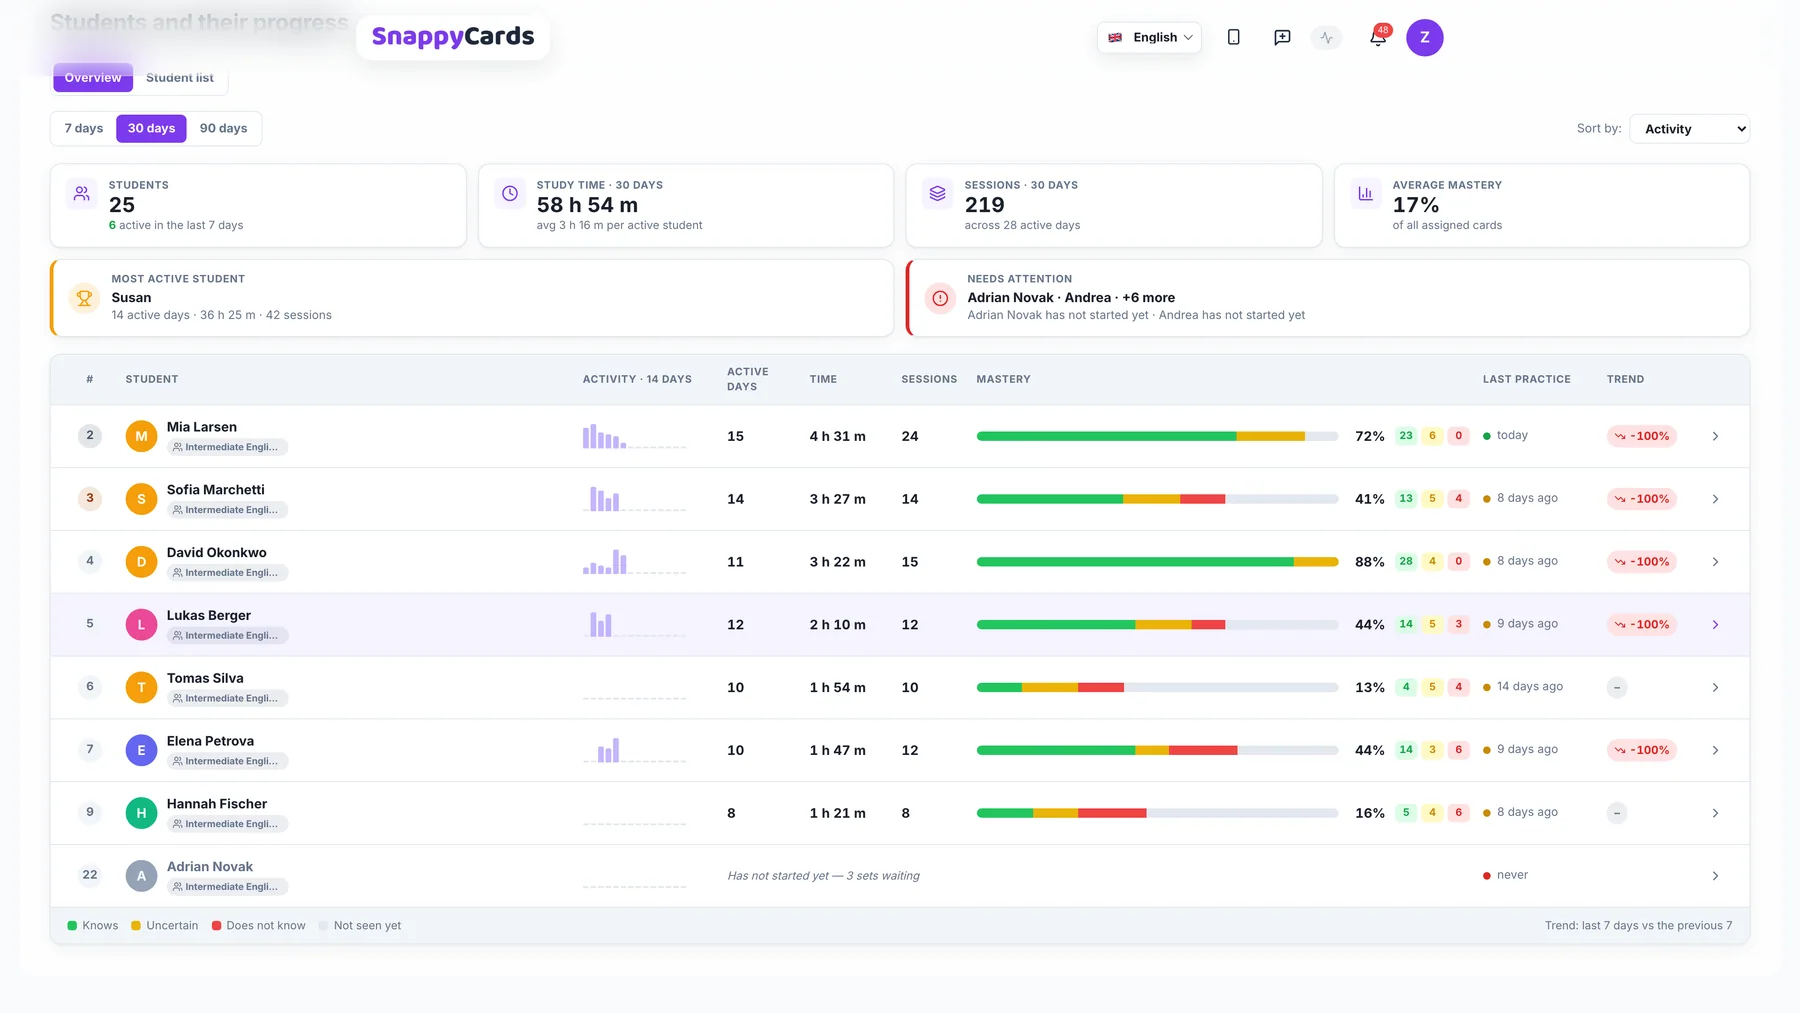
The overview sheet puts every student on one page: totals across the top, two highlights, then a row each with a fourteen-day sparkline, active days, time, sessions, a mastery bar and a seven-day trend.
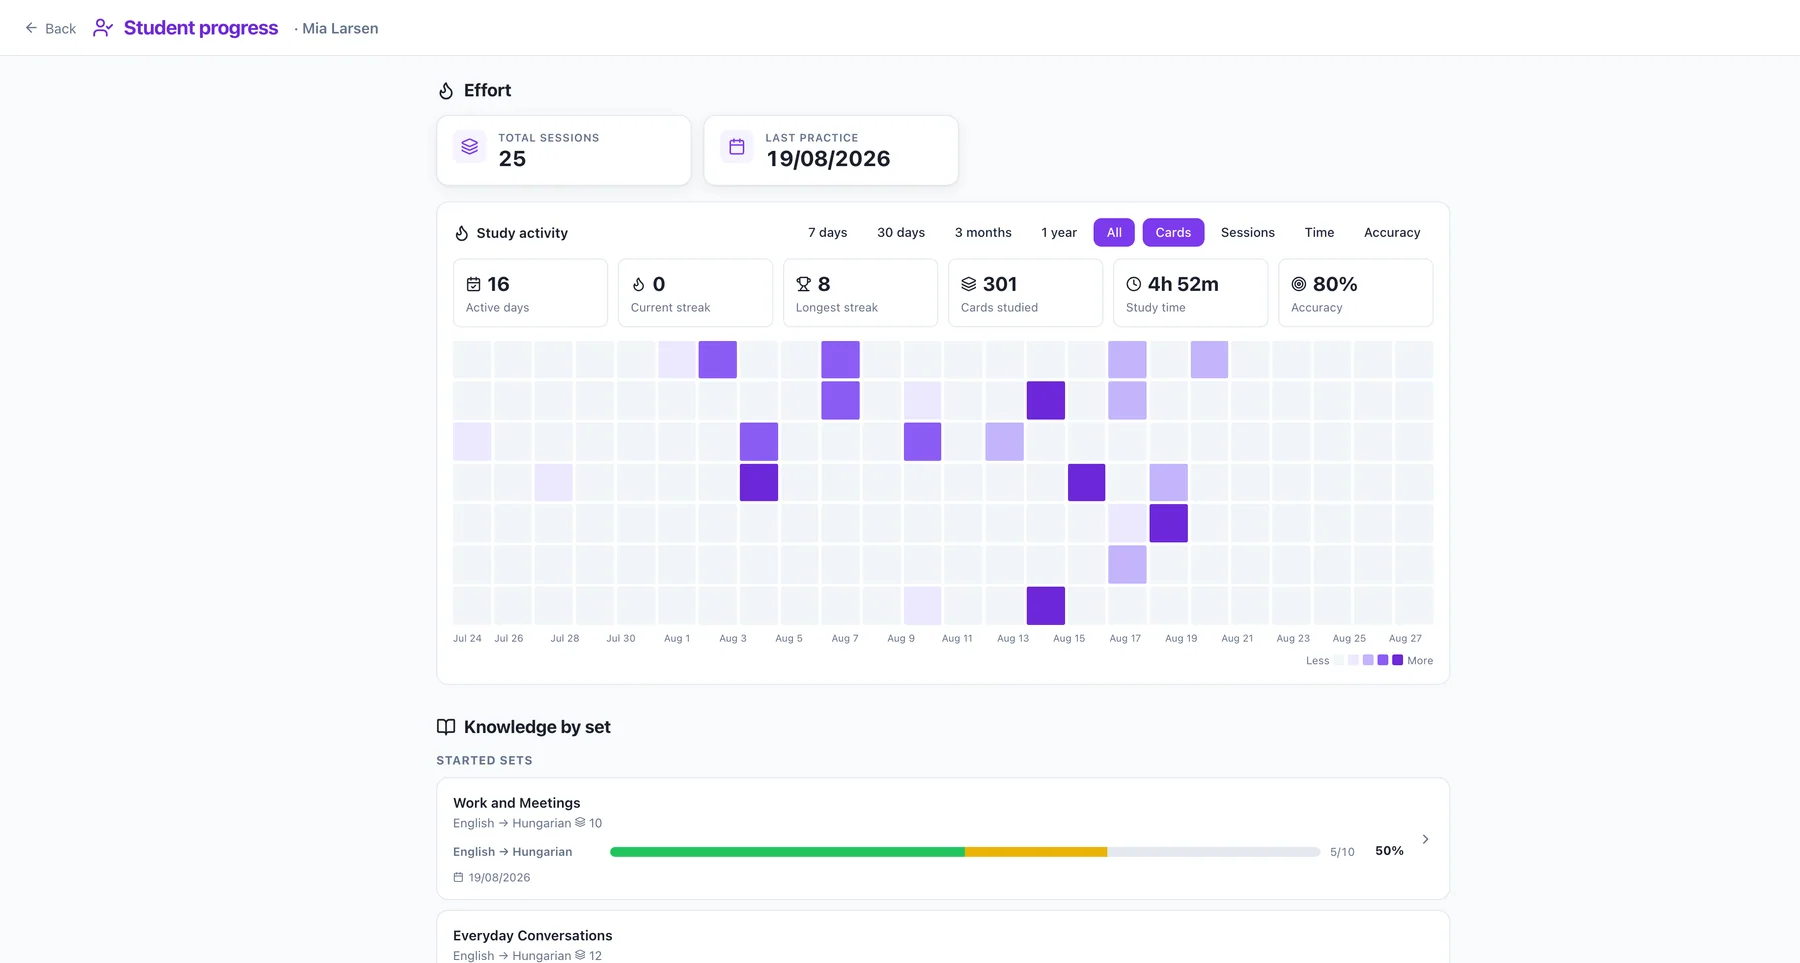
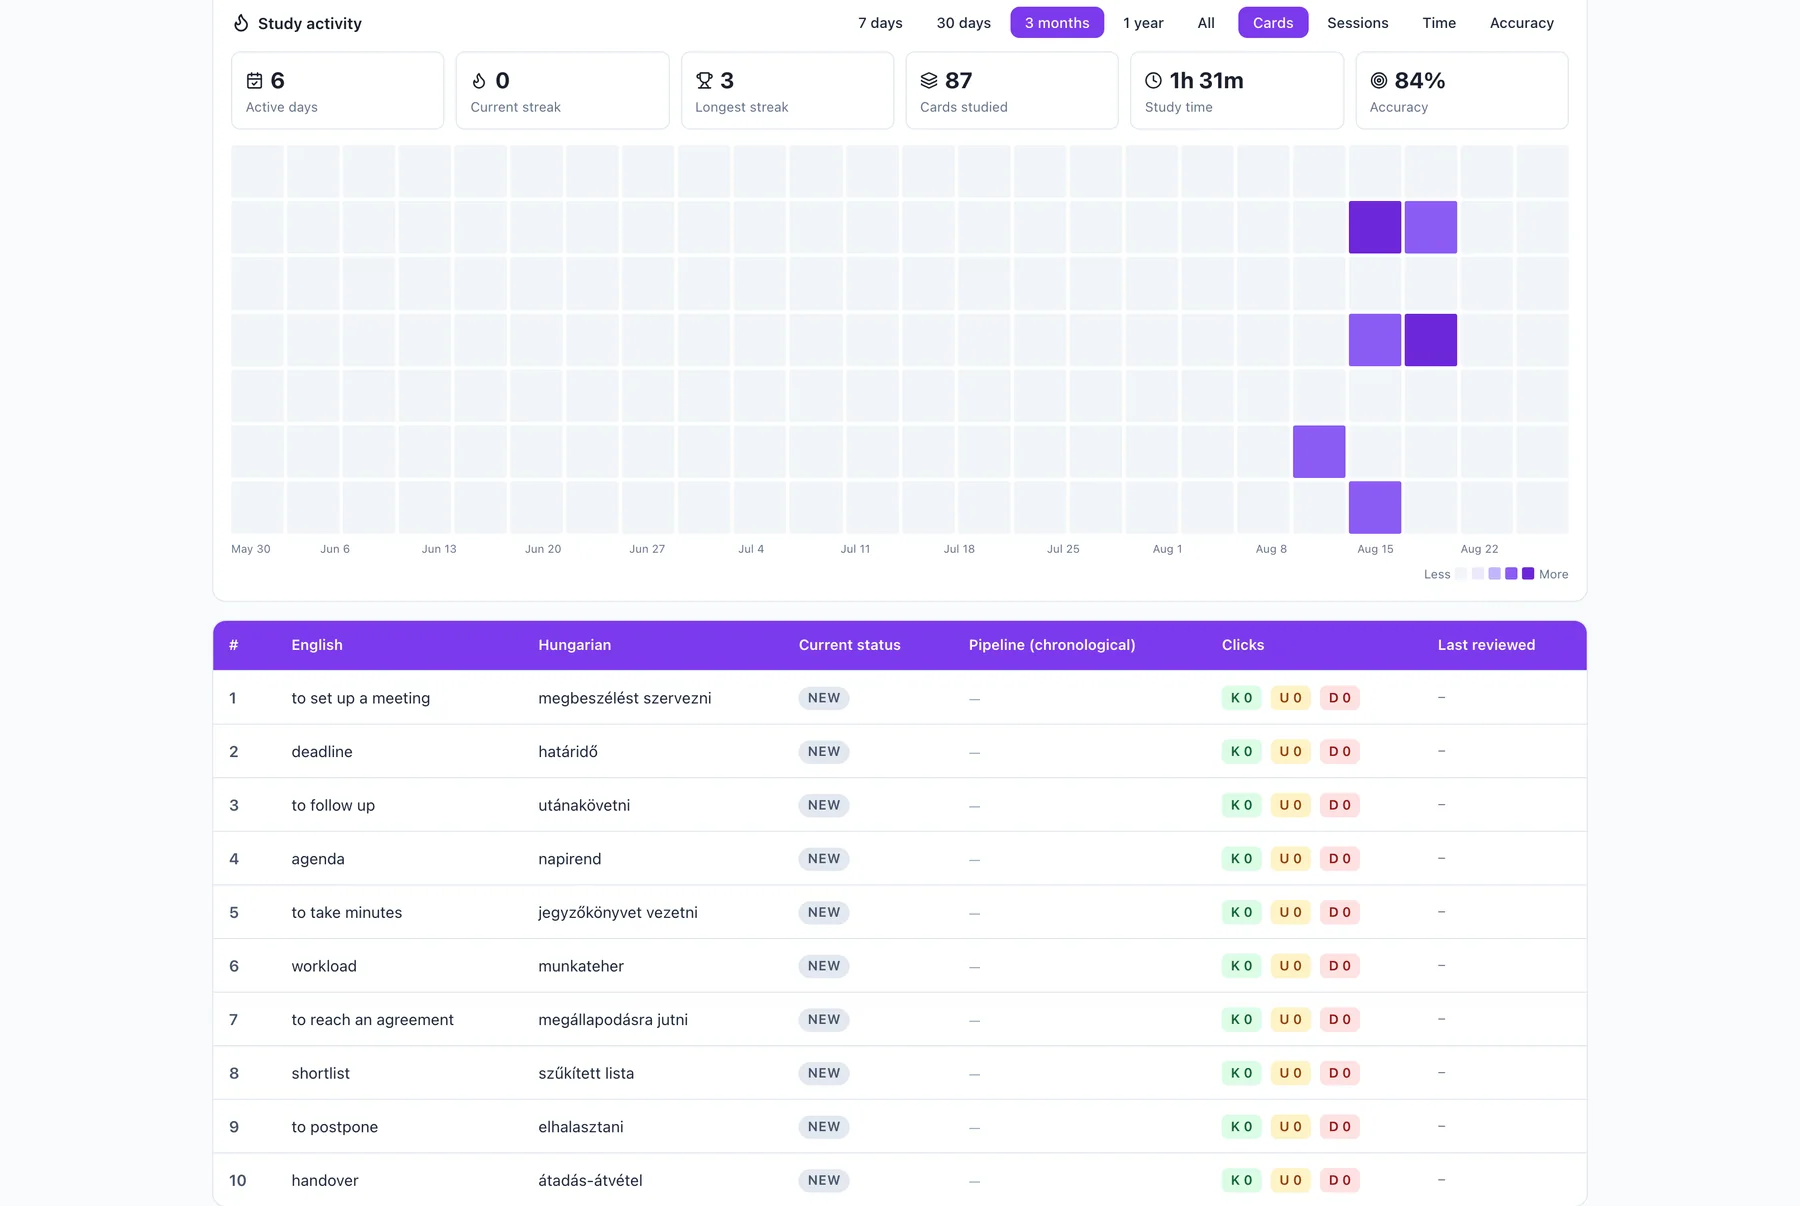
Open a row and you get that student's own page: a year of activity as a grid, the sets they started, the sets they never opened, mastery per direction, and the cards they keep getting wrong.
How to use it before a lesson
- Open the overview and change the window (7 / 30 / 90 days). Everything recomputes — KPIs, highlights, rows.
- Filter to one group if you teach several, so the other classes stop moving the averages.
- Open the student the sheet pointed you at, and read the activity grid first: every day for a fortnight then nothing since October is a different story from twenty minutes every Sunday.
- Scroll to the cards they keep missing. That is your warm-up for Thursday.
- For a full picture of one set, open the card-level table and flip the direction — recognising a word and producing it are different skills, stored separately.
Why it works this way
“Sixty percent” is a number you cannot teach from. Which sixty percent? These three screens exist to turn an impression into something you can say out loud: eight words, by name, in a conversation with a parent — rather than a verdict.
And the sets a student never opened are usually the more interesting half. A set nobody touched is not a learning problem; it is a set that was assigned and never mentioned again.